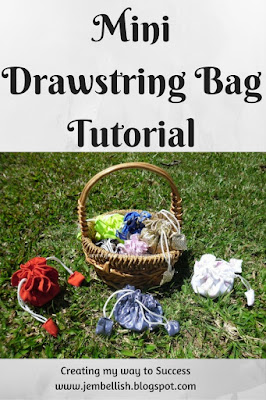
I made a few of these small bags as part of my project to reorganize my sewing desk.
Making them, I realised they would be perfect for this series of simple things that anyone can sew in just 5 steps and 15 minutes!
So here's how:
Step 1
Choose your material - softer material will draw up better.
Cut 2 circles. I used a dinner plate as a template - you can make them any size you like!
You also need a couple of rectangular scraps and some cord:
Step 2
Sew 2 button holes in one piece of fabric at opposite sides and just a few centimetres or about an inch in from the side.
If buttonholes are too scary - you could just snip a couple of holes, and seal the edges with fraycheck liquid.
(you can buy this from fabric or craft stores)
Place your two circles right sides together and machine stitch with a 3/8" seam. Leave a gap of a few cm or a couple of inches to allow you to turn the fabric out.
Step 3
Turn the fabric right sides out. Iron flat if you need to, then top-stitch around the outside close to the edge.
Now run 2 more rows of stitching around your circle, on either side of your buttonholes:
Step 4
Using a large safety pin or nappy pin, thread your cord through one buttonhole, push all the way around and out of the same buttonhole. Cut the cord and tie both ends together.
Repeat with another piece of cord starting at the other buttonhole:
Step 5
Now take your rectangular scraps. Fold in half right sides together and stitch on either side:
Turn right sides out and push each cord knot inside one of these little pockets. Tuck the ends under and machine stitch closed:
All done!
Fill up with your little trinkets!
You can make lots of these as party favours, or just cute storage bags:
For the downloadable PDF version of this tutorial, click here.
Come back tomorrow to see what I made mine for!!
I hope you enjoyed this tutorial. If you're feeling a bit more confident in your sewing abilities - this is a simpler version of my popular Jewellery Bag Tutorial.
The jewellery bag has several small pockets on the inside too!
For over 100 more free sewing tutorials - for all sewing abilities, take a look at


.jpg)
.jpg)
.jpg)
.jpg)
.jpg)
.jpg)
.jpg)
.jpg)
.jpg)
.jpg)
.jpg)
.jpg)
.jpg)


That is a really neat bag, Jill. I'm throwing a baby shower for my sister, and these would be perfect for the favors! :)
ReplyDeleteThanks Jenni! They're really quick to make and are a great way to use up scraps too!
DeleteI'm so glad that I'm following you! How creative! Thanks so much for sharing:)
ReplyDeleteKatie
www.funhomethings.com
Thanks Katie!
DeleteWonderful idea and thanks for sharing!!!
ReplyDeleteThank you!
Deleteso cute!
ReplyDeleteThanks Donna!
Delete