Day 49 - Use What You've Got


A little slow to get today's post up - I'm in Sunday mode!!

I've just been picking things from our garden. The tomato plants all needed trimmed back - so I picked the last of the tomatoes (mostly green ones). Also a few peppers - a purple capsicum, green capsicum 2 jalapenos and a few chillis. Then finally a very colourful carrot crop!


Now to put them to good use! Some will go in salads to make them nice and colourful - but the green tomatoes I need some inspiration for!

I remember last year my mum telling me she found a recipe for green tomato cake that turned out very tasty!  I'm not sure I'm convinced I want to make a cake out of them though! I shall have to Google what to do with green tomatoes!

Any suggestions very welcome!


Are you harvesting anything tasty from your garden just now!!

Jill

Extra Moist Banana and Raisin Muffins - Day 47 Use What You've Got


A few years ago, I used to have a market stall at the local shopping centre once a month, selling things I'd made. There, I met a lovely lady called Mary, who made and sold beautiful baby and kids clothes.  We used to chat at the markets, and occasionally I'd visit her at home.  A couple of years ago, she sold up and moved down South to a retirement village to be nearer her family.  When she left she gave me piles of fabric and crafting books that she no longer had space for.  I miss seeing her around and our chats about sewing.

So what has all this to do with muffins?  Well this recipe is one she gave me. It was her favourite and she always had some made up and frozen ready to warm in the microwave and serve up with a cup of tea if anyone came calling. I had many a 'Banana and Raisin' muffin with Mary, and they will always make me think of her!

 Mary's Extra Moist Banana and Raisin Muffin Recipe

3/4 cup boiling water
1teaspoon bicarbonate of soda
1 cup raisins
1 cup other dried fruit you like - eg. dates or currents
1 cup mashed banana
1/2 cup grapeseed oil
1/2 cup apple juice concentrate or caster sugar
2 large eggs
1 1/2 cups self raising flour
1/2 cup plain flour

Combine the boiling water, bicarb and dried fruit in a bowl. Leave to stand for 10 mins

Preheat oven to 180C and lightly grease the muffin tray.

In another bowl, combine the banana, oil, apple juice concentrate and eggs. Beat.

Stir the dried fruit and their liquid into the banana mixture.
Sift the flours into the mixture and stir to combine.

Spoon into the muffin tray.

Bake for 20-25 minutes until golden brown.

Enjoy with a cuppa and a friend!


Notebook and pen folder from upcycled shorts - Day 46 Use What You've Got


Last week I made some mini backpacks with some old shorts I had in my stash. 

I still have some of the fabric from the shorts left, so yesterday I made a matching notebook folder:


I adapted this tutorial for the folder.

I think they make a cute little matching set.


With the all important seal of approval from my two girls, I think I'll make matching folders for the other backpacks too!


Jill

How to make a personalised fabric bookmark - Day 44 Use What You've Got


I've been sorting through and clearing my computer files recently. In my tutorials folder I found some that I made a couple of years ago for my girls to follow when they were learning so sew some basic things.  I thought I may as well make use of these tutorials and share them on the blog.

Here's one for making a personalised fabric bookmark like this:

It's a very simple and straightforward sewing projects - great for kids to get started on learning to sew!

The full tutorial is available as a free PDF download - to get it, 

Can your kids sew? Did you teach them? Do you think it's important for them to learn to follow instructions for sewing and creating things, or is it better to let them learn by experimenting and playing around with the fabric and supplies?


Door hanger reminder notes - Day 40 Use What You've Got


A couple of days ago on Facebook, Meijo's Joy shared a picture of notepads in the shape of door hangers for leaving reminder notes on. I thought they were a great idea - as I'm always looking for ways to help my kids remember what to take to school each day!

But rather than notepads - I wanted to make something that was reusable.

So I got some cardboard and coloured paper, cut the door-hanger shape from them, stuck them all together and covered them with clear contact paper (that you use for covering books).

I made one with red on one side and green on the other..


And another with blue on one side and yellow on the other.


Then I just added a board pen and a piece of fabric (from my scrap stash) for rubbing the messages out before writing new ones.

Hopefully now my girls will be able to leave themselves notes and never forget anything for school again!

I can always hope anyway! It'll certainly be a novelty for a while!

This was a great project using what I already had in the house. It cost me nothing and hopefully will be very useful!

How do you help your kids remember what to take to school each day?  I've tried all kinds of notes before -but I'm hoping this one will be successful!

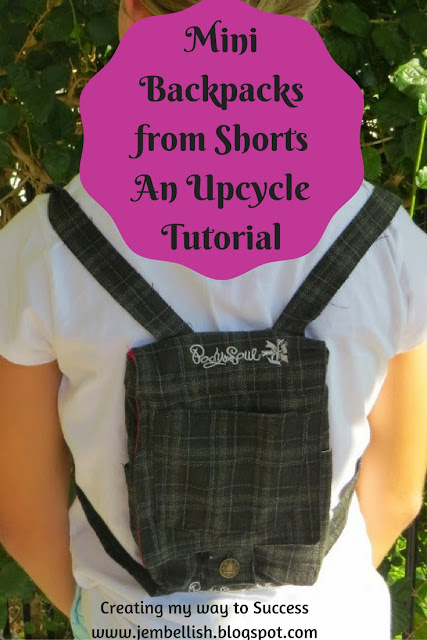
Mini backpacks from shorts - an upcycle tutorial. Day 39 Use What You've Got


I have a pile of shorts in my stash to be upcycled, 
and had the idea of making mini backpacks with them. 
The size is perfect for kids - or for adults when you just want to take a small bag that won't get in your way!

As this is an upcycle tutorial and you won't necessarily have the same type of shorts - I've tried to be as general as I can, and sizes will depend on the size of the shorts you use!

So here's the shorts I started with, together with a little plain fabric for the bag lining:


Cutting the pieces
The hem of the shorts was wide and had a neat finish. So first I carefully cut both hems off to use as the bag straps.


Next I cut the  button and hole fastening from the front of the shorts, so that I could use this for the bag fastening.


Then, the main bag part was cut from one side of the shorts:

Cutting through both layers of the shorts to end up with a folded piece of fabric:

For the flap of the backpack, I cut around the back pocket of the other side of the shorts, so this piece was a little smaller than the folded piece.

Finally I cut pieces of the inner fabric the same size as these two larger pieces from the shorts.
Now here's all the pieces for the mini backpack:


Making the mini backpack
First the flap: Take the buttonhole piece from the shorts

Lay this at the bottom and in the middle of the flap for the bag like this:

Then lay the inner fabric flap piece on top of this, flip the whole thing over and pin around the side and bottom sides (where the button hole piece is)


Then turn the flap right sides out, trim the corners


 and top-stitch around those 3 sides.

Now for the main bag part
Take the button from the shorts and place this about 2.cm (1") up from the bottom centre of what will be the front of the bag.


Pin then stitch around the button using a zig zag or appliqué stitch on your machine. Remember to only stitch through one layer of the fabric!


Now place the two straps on the same part of the bag with the ends lined up with the bottom of the bag as shown:

Then fold the bag in half - right sides together and pin around the side and bottom edges:
Stitch along both sides.

Boxing out the corners of the bag
Now put your hand inside the bag and 'puff out' one of the corners like this:


Flatten the corner so the side and bottom seams are lined up - and stitch a line across like this:

Then snip off the pointy corner just above your line of stitching

Repeat with the other corner. Then turn the bag right side out.
Place the other ends of the straps on the top end of the bag as shown - making sure the straps aren't twisted!


Then place the bag 'flap' outer fabric side down on top and pin and stitch into place.


The bag lining
Take the last piece of inner fabric you have and fold in half like the outer bag part. 


 Pin along the side and bottom, leaving a gap along the bottom for turning the bag out.


Box out the corners of this piece just as you did with the outer part.


Putting it all together
Now take your outer bag and slide it inside the inner bag so that the right sides of both fabrics are facing each other.

Matching up the open ends, pin then stitch the two parts together.


Using the gap you left in the bottom of the inner part of the bag, turn the bag right sides out.

Stitch the opening closed. You could use a slip-stitch to make the stitching invisible, but since this is the inside of the bag and won't be seen, I just simply machine stitched the opening closed.

And there you have, one mini backpack!


They're a great size for little kids too! 
(This is the closest I had to a little kid for modelling purposes!)
For the downloadable PDF version of this tutorial, click here.


For more upcycle tutorials you can go here

Or for over 100 sewing tutorials for all kinds of things and all levels and abilities of sewing, go here.