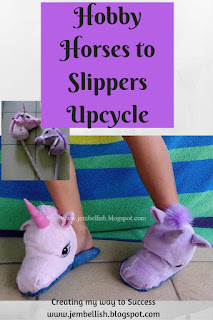
Soft toys to Slippers - an upcycle tutorial


This is one of a few projects I had set myself a while ago - find something to do with these old soft hobby horses that my girls had grown out of!

The unicorns were too cute and cuddly to get rid of - so I wanted a way we could keep them - they just needed a new purpose!

So re-purposed they were - and they are now enjoying a new life as a pair of cute and cosy slippers!

So here's how to convert a pair of old hobby horses - or other soft toys, into a pair of slippers!

You will need:

2 soft toys for the top of the slippers.
Denim or or other thick fabric for the main slipper part
Foam for the slipper bases
Paper, pen, scissors and pins

First draw around the foot that the slippers are meant for:
Then cut this shape out - leaving and extra 2 cm (approx 1") around the edges. This is your slipper base template.
Cut two pieces of foam using this template:

Now cut 4 pieces of denim (or other thick fabric), 2 to cover each foam piece. These should be a little larger again than the foam pieces - allow an extra 1.5cm (approx 0.5") all the way around.

Next, with right sides facing - sew two denim pieces together, leaving a gap around what will be the front of the slipper. 


Turn this right sides out and push in one of the foam pieces.

Repeat for the other foot. You should now have two slipper bases.

Now to the cuddly toy part.  You need to cut open the soft toy and pull out most of the stuffing.  

Now place the shell of the toy over the front of the slipper to guage the size and trim the fabric to size.

  Then use the offcuts to pin around the bottom of the toy to enclose it.  Basically you want to make it the size you'd like to sit on the top of your slipper under your toes.

Stitch around the edges, leaving a small gap - then push some stuffing back in. You need enough to keep the shape of the animal - but also not so stuffed as you need to be able to squeeze the edges to stitch around them.

Once you feel you have enough stuffing in - hand-stitch the opening closed.
Now place your soft toy at the top front of your slipper bases. Making sure all the raw edges are turned in - pin the toy to the slipper around the front:


Then carefully stitch the top to the base with your machine. Run the stitches backwards and forwards several times to secure at the edges.  You may also like to use a double row of stitching for extra strength! 
HINT:  If you use your zipper foot - it's easier to stitch around the bulky edge of the toy!


And there you have a new pair of slippers - and a way of preserving old soft toys!


I only wish I'd made them my size!! 

For the downloadable PDF version of this tutorial, click here.


So tell me - what do you think???

For over 100 more free sewing tutorials for all levels of sewing ability, take a look at 


My own denim pouf


Inspired by Michele Made Me's 'One Tough Pouf"

This is my own slightly altered version based on 
Michele's fabulous tutorial.
Mine isn't as pretty and fancy as Michele's gorgeous Pouf - I didn't add any embroidery, and cut fewer pieces so the effect is a little plainer.

This is one of 5 projects I'm aiming to finish over the space of two weeks.

So far, I've upcycled an old squished bean bag into 3 new tablet bean bags.

I've turned old towels into reusable kitchen roll.

And now I've mangaged to sort through and use up most of my clothes upcycling pile...

First I picked out those clothes that were intact and in good condition and took them to the charity shop.
Then I removed buttons, notions and cut fabric from torn and already half used clothes. I added these to my nicely organised fabric and notions stash!

Finally I cut up the stash of jeans I had into useable pieces of denim, and separated the pockets (which I'll save for other projects!)

I'd had Michele's denin pouf on one of my Pinterest boards for ages - so decided it was time to make it.
I stuffed it with all the rest of the clothing scraps I had - together with lots more scraps I've hoarded for a long time - bits of old curtains, cushion covers and old worn sheets; and all the left over bits of the jeans I just cut up - seams, waistbands etc.

This was the perfect project to use up lot of things in one go!


We have a sofa with a 'chaise longue' - and that's the part that EVERYONE wants to sit on so they can put their feet up!
Well now - there is one more prime spot - where you can put your feet up on the nice new denim pouf!

Might be my new favourite spot!

So the only 2 projects I need to finish now are so something with these unicorn heads...

And tackle a quilt for my eldest daughter!

What have you ticked off your to-do list lately?


My first Amigurumi!


My reason behind learning to crochet this year with my daughter is mainly to be able to make Amigurumi!
For those of you who don't know,

Amigurumi 
is the Japanese art of knitting or crocheting little stuffed creatures. 


Living up here in the tropics of Australia, there is never much need for woolly jumpers, scarves, hats etc, so I've not really thought much about knitting or crocheting.

However, when I learned about Amigurumi - it gave me the idea to learn crochet - and teach my daughters a new skill; particularly my youngest daughter who loves small stuffed creatures. Whenever we go out to the shops she always finds some kind of little stuffed thing that she wants to buy.

Anyway, I showed her lots of Amigurumi pictures and together we have embarked on our quest to learn how to make them by learning how to crochet!

Our progress is slow - basically I've only learned how to do chains and single crochet (think that's what they're called).

Now while practising these basic stitches, I've been trying to decipher tutorials, you tube videos and various how-to books and pictures.  Bits here and there seem to make sense but I haven't found one particular site or video that is really clear to my way of thinking.

So - practice it is and keep on reading, watching and learning.

I am very proud to show you my first little creatures - the first of which has been named - Mr Squishy..

And the second as yet unnamed:

From snippets of video tutorials I figured out how to add eyes etc using beads - and also how to add in an extra colour - see the band of light pink here??

Now I'm sure my actual crocheting leaves a lot to be desired - missed stitches, doubled up bits and there was no counting went on at all!

However - I'm just practising now and getting more comfortable with my hook.

My daughter is delighted with her first little monsters, and is still practising and experimenting herself with her hook and wool!

We'll keep on practising and keep on sharing our progress!

And I'd love for you to tell me....what do you think of my little monsters?

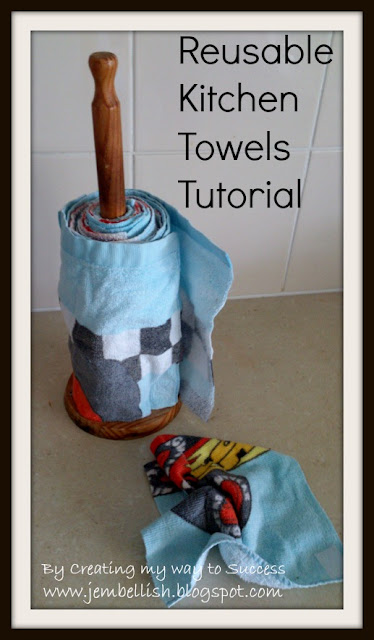
Reusable kitchen towels upcycled from old towel - a tutorial


I've been wanting to make these for ages and finally got 
A Round Tuit!

It's not my original idea and there are other tutorials out there - with neater edges and prettier fabric, but I wanted to show you how I made mine simply and quickly using an old towel!

I have several of these kiddie hooded towels that my girls used to love but have now grown out of:

They are quite faded worn, but still perfectly good towels - so I had to find another use for them! This seemed to suit perfectly!

So here's how to make an old towel into useful re-usable kitchen roll!

You will need:
An old towel
Sew-in Velcro
Scissors

First cut your towel into squares.
I cut mine to 20 x 20 cm (8 x 8") -
 I got about 16 squares out of one towel.
If you have an overlocker (serger) you could finish off the edges to prevent fraying.

Cut small pieces of Velcro around 2 cm (approx 1") long.
Pin and Stitch 2 pieces of one side of the Velcro (hook) to the top and bottom left corners of a towel square; and 2 pieces of the other side of the Velcro (loop) to the top and bottom right corners of the underside of the square like this:

Stitch all the way around each piece of Velcro and also a cross in the middle to hold it securely in place:

Repeat this for each square of towel you cut.
Now you can simply connect each square together using the Velcro pieces to make one long roll of reusable kitchen towels!
If you have a towel holder - you can glue 2 pieces of Velcro (or use sticky Velcro if you have it) to the holder to attach one towel to.


Then keep attaching the squares and rolling them around the holder:

For the downloadable PDF version of this tutorial, click here.

Now I still have four of these hooded towels left. But I only need one roll of reusable kitchen towels since the towels will just be washed and erm...reused! :)

The others I think I'll just cut into larger squares and use for ever useful floor cloths!

What have you used your old towels for?


More Crochet Progress


This year I am learning to crochet together with my youngest daughter.
I've been practising but still haven't progressed to actually making anything yet!

I've learnt that for me the easiest colour to work with (of the random selection of wool I have) seems to be yellow!

In yellow - I seem to be able to see the loops and stitches much clearer than other colours!

I also learnt that counting those stitches is very important.

I found a nice simple Amigurumi tutorial, and thought I'd give it a go!
I wasn't always sure I was sticking my hook in the right loops, but it seemed to be going OK.
I also lost count....LOTS and ended up with a much larger circle than I should have had! At that stage I abandoned the tutorial not wanting to end up with a giant Amigurumi monster!

It did give me lots of practice and I think my crocheting is getting neater and a bit more even.

I'm going to have another try at another pattern later and concentrate on my counting! 
Maybe I'll manage to make a little monster if I get it right this time.

I'll be sure to share lots of pictures when I get there!


I'll be linking this post up with My Creative Space over at Kidspot.

Finished first project on to-do list!


I had hoped to finish this first project yesterday, but it kind of spilled over into today.

Still it's done now - and that's one of the five projects for these two weeks done! 

I managed to make 3 tablet bean bags out of this old squished bean bag that nobody used anymore:

I used up some fabric from my stash.  For the inner bags I used kiddy fabric that I no longer have a use for since my girls and their friends have grown out of that stage!

I also still have just enough of the 'beans' left to make another of these small bean bags should the need arise - for a gift perhaps!

For now - it's good to have ticked something off the list and also to have my own tablet bean bag now - so I don't have to keep borrowing my daughter's!!


Have you checked anything off your to-do list today?


Projects!

This week is the first full week back at school for my girls - so my first full week back to doing my stuff!!
Yesterday I tackled the spare room which is where I'd dumped everything I'd sorted from the rest of the house but didn't know what to do with or where to put!

So, I was ruthless and cleared the pile!

My rubbish bin is a little fuller, and I now just have 5 sewing projects to complete to clear the bed completely - hopefully in time for our next visitors in 2 weeks time!

So - my projects to complete are:

1. Upcycle these unicorns into something else....
I'm thinking perhaps slippers?  But as to how....

2. Turn this old squished bean bag that nobody ever uses...

into perhaps a couple of smaller tablet bean bags - that my girls are also using as pillows, and that I want one of my own of!

3. Make my elder daughter a fishy quilt for her bed.
I made my younger daughter this one last year...
..and have had this huge bag full of scraps and fleece sitting patiently waiting since then for me to make the other one .
I just need to get A Round Tuit!

4. Make these old towels into reusable kitchen roll:

5. Use up my box and bag full of clothes to be upcycled!
I should have plenty of inspiration here - with over 600 clothes upcycling ideas now linked up!
So - I've slotted these projects into my diary for the next 2 weeks - the plan being they will be completed in that time!

Here goes!!!