Showing posts with label Sewing. Show all posts

150+ Free Sewing Tutorials


Over the years I have been blogging, I have gradually built up a huge resource of my own sewing tutorials.
My Mum and Granny were both dressmakers and taught me to sew as a child, but I didn't really develop much of an interest in sewing until I had my own kids and began making things for them.

Being a teacher, I have carefully recorded how I've made things, and created over 150 sewing tutorials with detailed photos and descriptions, so that I can share the 'how tos' and others can have a go at making things for themselves and others too.  

Creativity and making things are such important skills to learn and have. Sewing just happens to be my medium.  My Mum and Granny used to sew mainly clothes for us out of necessity - it was cheaper to make than buy.  That is no longer the case for clothes now, but it still holds true that to make your own clothes and other things gives not only a great deal of personal satisfaction, but also results in unique and one-of-a-kind things to keep for yourself or give as gifts.  Designer products if you like - not just the mass produced store-bought things that everyone has!

Sewing has allowed me to make so many things for my kids and others over the years, as I've received many requests for things that you may not be able to just go out and buy, like, 
a carrot pencil case for a friend's birthday..


or penguin suits for a whole class of kids when they won

A bag for a friend whose old one had broken, but she loved the style and wanted another just the same.


Or even just a bag for myself, exactly the size, style, shape and colour I want!


I have made so many different things from bags to clothes, pencil cases to oven mitts and novelty gifts for Christmas.


So how do I find these sewing tutorials?

All my sewing tutorials are grouped together to make them easier to browse through or look for specific things.
You can start on the main page here and choose from there what type of sewing tutorial you are looking for.

I have tried to make each tutorial as clear and simple as possible to anyone can have a go at them. I even sometimes go back and use my own tutorials to make things again!
I have also turned each of the tutorials into PDF versions which can be downloaded for free if you prefer that! All links can be found on my tutorial pages or on each individual post.

I hope I can encourage and inspire others to sew and create in their own way - perhaps saving money, developing their skills of dexterity and creativity or simply just having fun!

Please do go take a look at My Free Sewing Tutorials

and I would love to see pictures of anything you make with them too!


Happy creating and sewing!


Want to save money in your kitchen? Try these!


We all know it's the small things that build up over time to cost us lots of money. So start saving now by swapping store bought and single use items for long-lasting and reusable home made versions using these simple ideas and tutorials.


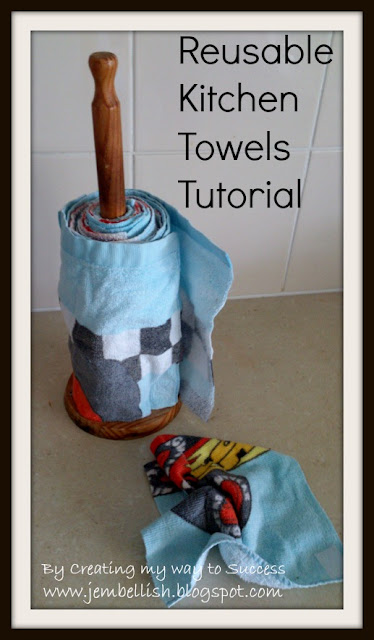
Don't buy kitchen towels!

Why not make your own that you can use over and over again. All you need is an old towel! Get the free tutorial here.


Don't buy cling film (plastic wrap)

You can make your own bowl, cup and plate covers from fabric scraps and a little elastic.


Don't buy zip lock bags or aluminium foil for wrapping snacks.

Make your own snack packs that can be thrown in the washing machine and used over and over again.


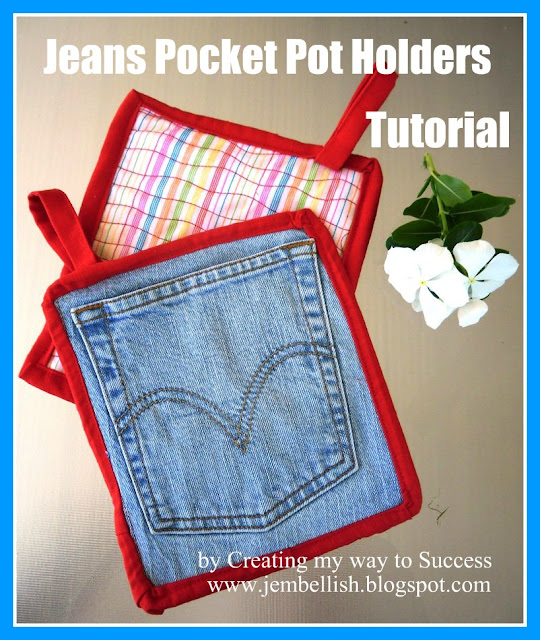
Don't buy new Hot Pads or Pot Holders


Use jeans pockets and fabric scraps to make your own!


Do you have any other ideas for saving money in the kitchen by switching to hand made instead of store bought?
Please leave a comment and links to any other tutorials that may be useful for this!

And for over 100 more free sewing tutorials for making all kinds of things and for all levels of sewing ability, please visit my 


A New Upcycled Denim Lunchbag


At the beginning of this year I decided to make my girls their own lunchbags for school instead of buying them. I deconstructed old torn ones and made the pattern template from the pieces. I also managed to reuse the insulation and zip.
I was so pleased with the result I made 3 lunchbags, one for both of my girls and one for myself too!

A friend saw these and gave me her old lunchbag that was split so I could reclaim the parts from that too - rather than throw it out.
She has also given me some old punctured pool toys as she knows I reuse the material in bags and things for waterproof lining.

So, last week, I decided I should finally get around to making a new lunchbag from the pieces she had given me.

I used the remains of an old pair of jeans for the main outer fabric, old pool toys for the waterproof lining, scraps of rip-stop nylon for binding the seams and the zip and insulation from the old lunchbag.

I didn't want to leave the bag plain and boring, so added my friend's name in shiny, glittery fabric!


I do hope she likes it!!


I used my own tutorial to make this bag. 
You can find that tutorial here.


Please do take a look at my other free sewing tutorials.
There are over 100 to make all kinds of things for all levels of sewing abilities.

And I would love if you followed me on Facebook - where I post all my goings on, upcycles and plenty of inspiration and fun!


Japanese sewing and origami


Today we head off on a family holiday to Japan, so I thought this would be a good time to showcase the 'Japanese' crafting I've done over the years - from Japanese style bags, to fabric and paper origami and some Japanese fabric too! Hope you like them!


This is still one of my most popular tutorials. These bags are fairly easy to make and super cute.  

I also made a few of them from upcycled old nighties:


And I also tried out a giant version of this bag.


Some Fabric Origami Boxes, square and triangular.


A Handibag made with Japanese Fabric. (made using this tutorial)


Paper Origami Flowers I made for a friend's daughter.


And finally what I recently learned about Origami and 


I hope you enjoyed these Japanese themed features!

If you're interested in seeing some pictures from our trip - I shall be posting some on Instagram and my Facebook page - so please do take a look!


A new needle book - sewing for me!


A couple of weeks ago, I made my daughters their own sewing bag kits which included personalised needle books. I thought they were so cute that I just had to make myself one too!

I was grateful that I'd made a tutorial for these, so I didn't have to figure out the measurements again!

I add a couple of extra felt 'pages' to mine too, as I have a LOT of needles!

So now my needles are all neatly and prettily stored..

I'm looking at my pincushion, which doesn't seem very cute or exciting.

I have a whole Pinterest Pincushion Board full of cute ideas.
I think the next time I sew something for myself, I might make myself a funky new pincushion!

Do you have a nice needle book and pincushion?  


Sewing Kit Bag - A Tutorial


This year, my girls have been doing more and more sewing, and recently they spent some time pattern testing the tutorials for my new e-book (Teach your kids to sew with a pair of Jeans).

So I wanted to make them something to say 'Thank-you' and something they could use in the years to come when they sew.

I decided on small boxy bags, made from denim upcycled from jeans, filled with sewing things including special little personalised needle cases and cute tomato pincushions.

Both girls loved their gifts, and so did I!  I think I might have to make myself one too!

This one is my younger daughter's.


And this pink and white one is my elder daughter's.


Here's how to make your own, if you'd like one of these personalised sewing kits - either for yourself or for a friend or perhaps for your child to encourage them to sew!


The Sewing Kit Bag 

You will need,
2 main outer pieces of fabric (I used denim) 34 x 20 cm (13.5 x 8")
1 piece outer fabric for the strap 18 x 10 cm (7 x 4")
2 inner pieces of fabric 34 x 20 cm (13.5 x 8")
1 zip longer than 34 cm
Fusible Webbing
Fabric Scraps for appliqué


First your appliqué
You can choose to add any kind of pictures or lettering you like on this bag. I chose to add an initial letter on one side,

 a sewing machine on the other side 

and on the top, a pair of scissors and a needle and thread.
I just drew these pictures freehand - the template of my drawings can be downloaded here if you're interested!

Choose the designs and the fabrics you want to use. Then iron your fusible webbing to the back of your pieces.  Draw your designs as a mirror image on the paper side of the fusible webbing.

 Cut the designs out then peel off the backing and iron onto your main outer fabric rectangles.  
The fabric will be split into thirds when the case is finished. The top third, side third and underneath third.


Appliqué or zig zag stitch around the edges of all your letters and pictures to secure them in place.


Now to put the bag together
Lay one of your outer fabric pieces right sides up. Put the zip face down on top of this at the top, then one of your inner fabric pieces face down on top of the whole thing. The fabrics should be right sides facing.

Line up the top three edges and pin then stitch into place using your zipper foot.


Pull both fabrics back from the zip and top-stitch close to the zip teeth. This is to prevent the fabric catching in the zip when you open and close the zip.


Now the other side. Place your other inner fabric piece face up, then lie the part you just made with the zip face up on top of that and finally your other outer fabric piece face down on top. Basically you want your inner pieces right sides together and your outer pieces right sides together.


Pin then stitch across the top with your zipper foot.


Then once again pull back the fabrics from the zip and top stitch close to the zip teeth.


Now flip your fabrics so both outer fabrics are facing right sides together on one side of the zip, and both inner fabrics are facing right sides together on the other side of the zip.  Match up the raw edges and pin then stitch them together.


Turn your bag so that it is inside out. Lay it flat with the zip in the middle at the top and the centre seam in the middle on the bottom.

With the zip open, pin both short sides together, and stitch across both ends.


Trim off the excess zip and the edge of the seam with pinking shears to help prevent fraying. If you don't have pinking shears you could run a line of zig zag stitching close to the seam and then trim with regular dressmaking scissors.


The Strap
Take your strap piece. Fold the long sides into the centre like this.

Then fold the whole thing in half to hide the raw edges.


It should look like this.  Top stitch down both long edges to hold in place.


Box out the corners and add the strap
Pinch one of the corners of your bag and flatten it to a triangle shape.


This is where your strap will be attached, inside this corner!
(This picture shows where the strap will sit, but you need to push it inside as shown in the next picture)


The strap is now inside, pushed right up as far into the corner as it will go.


Stitch across the corner about 
2.5 cm (1") from the point of the triangle)


Take the other end of the strap and push it into the other corner near it as you pinch that into a flat triangle too. Make sure the strap isn't twisted!


Stitch across that corner as you did with the other one.
Then pinch, pin and stitch the other two corners in the same way. This makes the nice box shape for your bag.


 Cut each corner off using pinking shears again to prevent fraying.


Turn your bag right sides out, and it's done!


This tutorial is also available as a free PDF download here.

So there you have a complete personalised sewing kit bag.

I made each of my girls a personalised needle case and a tomato pincushion to add to their sewing kits. I also added dressmakers scissors, threads, needles, pins, a white marking pencil, a thimble, a tape measure, a quick unpick and some safety pins.


Over the next couple of days I will share how I made the needle books and the tomato pincushions.

This would make an ideal gift for someone - together with