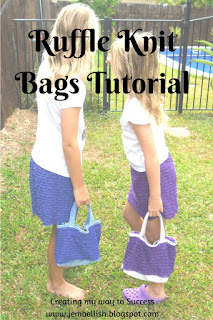
After making both my girls ruffly skirts, and one ruffly top, I decided to add a little bag each for them.
I used some denim scraps from old jeans, fabric from my stash for the lining and of course some of the lovely ruffle knit!
Here's a simple tutorial for making one of these bags:
Materials needed:
Denim (or other strong fabric for bag base and handles:
1 piece 32 x 16 cm (12.5 x 6.25")
2 pieces 32 x 3 cm (12.5 x 1.25")
2 pieces for straps 33 x 8 cm (13 x 3")
Ruffle knit ( or other pretty fabric for main bag sides )
2 pieces 32 x 16 cm (12.5 x 6.25")
Fabric for lining :
1 piece 50 x 32 cm (19.75 x 12.5")
Lay out your outer bag pieces like this:
Pin, then stitch these strips together - right sides together to form the main outer bag section.
Now take your outer bag piece and the lining piece - both of these should be the same size.
Fold them in half - short ends together, and right sides together. Pin and stitch down both sides:
Note: be careful when you pin the outer fabric that you match up all the seams neatly!
Now to 'box out' the bottom corners of the bag.
Put your hand inside the outer bag piece and reach into one of the corners:
Flatten out the sides of the bag up at the corner with the seam in the centre like this:
Then you need to stitch across the corner
4 cm (1.5") in from the point.
(I usually run 2 or 3 lines of stitching here for added strength)
Then cut off the corner outside your stitching.
Repeat this for both corners in both your outer and inner bag pieces.
Now to the straps.
Take the two strips of denim (or other fabric) for your straps and fold the outer long edges in to the centre like this:
Then fold the outer edges in again, so hiding both raw edges.
(If you feel more comfortable you can iron this as you fold and pin into place.)
Then stitch down both sides of each strap, close to the edge:
To attach the straps to the main bag.
Turn your main bag part right sides out and place one strap on each side of the bag matching up the raw edges like this, and pin in place:
Make sure the straps are in the same place on both sides of the bag.
Secure the straps in place with a couple of rows of stitching.
Now insert the lining inside the main bag:
And fold the top edges of both bag parts in towards each other to hide the raw edges. Pin all the way around:
Then topstitch all the way around the top of the bag to join the outer and inner bags together.
Done! Now fill up and use your new cute little bag!
My girls are 7 and 9 years old, and these bags are the perfect size for them. You could use firmer fabric, or add interfacing to make a bag that holds it's shape better (I just wanted soft bags for my girls!).
For the downloadable PDF version of this tutorial, click here.
If you like this tutorial - there are over 100 more on my tutorials page - suitable for all levels and abilities of sewing!


No comments:
Post a Comment
Note: Only a member of this blog may post a comment.