I'm off on holiday with my family very soon - so wanted to make myself a travel pouch to keep all the passports and tickets in.
I found the fabric on special a few weeks ago and couldn't resist!
Then when I picked up our travel documents and tickets and saw the wallet they all came in..
I thought - now there's a quick project to use up the fabric!
Doesn't this look so much cuter?
So here's the tutorial - if you want to make one yourself!
First the materials you will need:
Outer fabric
1 rectangle 28 x 26 cm (11 x 10.25")
(card pockets) 4 rectangles 12.5 x 5cm (5 x 2")
Inner fabric
(base) 2 rectangles 15 x 26cm (6 x 10.25")
(document pockets) 2 rectangles 13 x 26cm (5.25 x 10.25")
(passport pockets) 4 rectangles 12.5 x 10cm (5 x 4")
(closing band) 1 strip 6 x 45cm (2.5 x 17.75")
Inside zip pocket fabric
2 rectangles 20 x 12cm (8 x 4.75")
Other
1 zip 20 cm (8")
1 piece elastic 34cm (13.25")
2 rectangles of card 22 x 12cm (8.75 x 4.75")
Co-ordinating thread
(ignore the other longer zip in the photo - I didn't end up using it!)
So first you start with the smallest pockets. Those cut from the outer fabric.
Double turn one longer edge on each pocket and stitch - this will be the tops of the pockets.
Repeat this for the 4 inner fabric passport pockets.
Now you need to stitch the small card pockets to the bottom of 2 of the passport pockets.
Pin then stitch one 2cm (0.75") from the bottom :
Then match up the next card pocket with the very bottom of the passport pocket. Pin then stitch.
Now add all four passport pockets to the larger document pockets:
Place them so the bottom pocket will hide the base of the second one. Pin both then stitch along the base of each pocket.
Now double turn one longer edge of these pockets - pin then stitch to neaten the edge.
Make sure you finished the opposide edges on both sets of pockets - so you should then have two sets that will form the inside of your wallet. Pin these to the base rectangles of inner fabric and stitch along the outer edges:
Then place these two pieces right sides together - pin and stitch down what will be the centre fold of the inside of your wallet:
Now to the outer part of the wallet.
First you need to make the hidden zip pocket.
Pin one of your pocket pieces to the right side of the outside fabric. Centrally placed and about 3cm (1.25") in from the edge. (remember you're pinning this to the side of your wallet - so along the edge that is 26 cm (10.25") long.
Using a pencil and ruler - draw a rectangle where you want the opening of the zip to be:
Then stitch around this rectangle:
Cut along the centre of the rectangle through both layers of fabric:
Cutting the corners to the points like this:
Now push the pocket rectangle through the hole you just cut to the back of the fabric:
Press flat - then pin the zip to the back of the pocket - so it is showing through the opening:
Then stitch around all 4 sides using the zipper foot attachment on your machine:
Now turn your fabric over - and pin the remaining pocket rectangle to the one you just attached. Stitch around all 4 edges to make your pocket!
Now place your inner and outer fabric wallet pieces right sides together. Pin and stitch around the sides and the bottom. Leave the top open!
Trim the corners,
Turn right sides out and press. Then place pins up the centre seam of the inside of the wallet.
And stitch through both layers along this line.
Push the card rectangles into either side of the wallet from the open top end. Then fold the ends in on themselves and pin then stitch closed.
Now your basic wallet is almost finished!
To add the elastic closing strap. Take your long strip of inner fabric, fold in half lengthways right sides together and stitch:
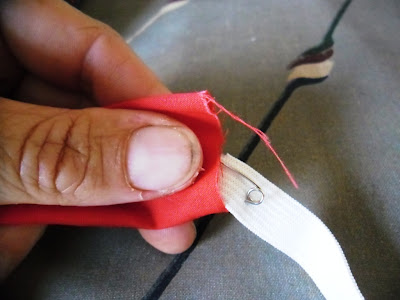
Turn the tube right sides out, then using a safety pin thread your elastic through the tube you just created - making sure to keep hold of both ends of the elastic!
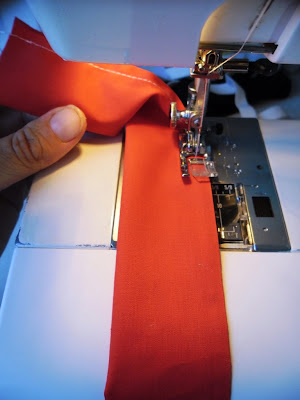
Stitch the two ends of elastic together to form a circle:
Then push the ends of the fabric tube one inside the other and fold the raw edges in to neaten. Stitch:
Then finally stitch this elastic tube to the center back of your wallet:
Then fill up your wallet with your travel documents:
The zip pocket is perfect for some ready cash at the airport!
Then slip the elastic around your closed wallet to keep it secure!
And you're all set for a big trip!!
The wallet fits perfectly into my new duffel handbag!
For the downloadable PDF version of this tutorial, click here.
I hope you liked this tutorial.
There are now over 100 Free Sewing Tutorials for all levels of sewing ability available on this blog.
To browse through these - go to
My Free Tutorials Page.


okay that is adorable! great tutorial!!
ReplyDeletethanks for following my blog, I'm now following yours too!!
Your travel wallet looks so much better than the generic one you were given. Much more festive and exciting.
ReplyDeleteNow, if only I were going somewhere...
Very detailed instructions, Jill. The document wallet is such a practical idea for keeping everything safe, yet at your fingertips. Love the material!!! I have some left over, so now know what to do with it.
ReplyDeleteLove the fabric! It is so fun. The elastic closure was a great idea too!
ReplyDeleteGreat tutorial! Looks like you're really getting to grips with zips. They're not that hard are they!?
ReplyDeleteHi! I wanted to stop by and thank you for joining the Planet Weidknecht Weekend Hop. I hope you'll join in again.
ReplyDeleteThis is so cute, I really want to make one!
ReplyDelete~your newest follower
www.theclumsycoquette.com
This is such a great idea. I will have to make one! I hope you will share this at my Delight Me party over at Doodles & Doilies.
ReplyDeletehi,
ReplyDeletegreat tutorial , great fabric
thank you so much the closure also
look nice and new. keep it up.I love all your tutorial, I am from
all the way INDIA.
fabulous! i love the fabric...where was this vacation to??
ReplyDeleteI like the travel document wallet post because it contains such a fine information that is easy to understood for me.
ReplyDelete