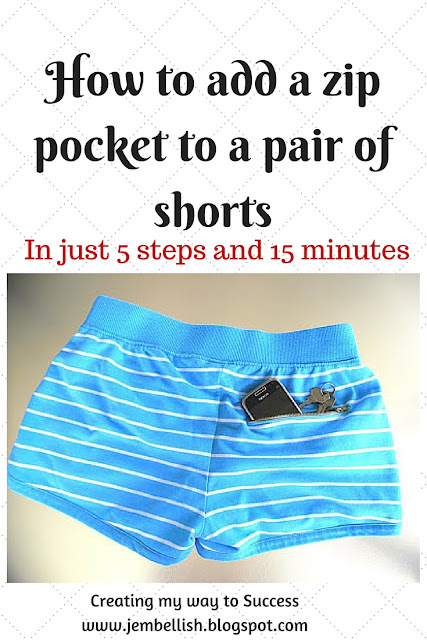
Just perfect for carrying your keys and phone when you go out for a walk or perhaps a jog!
You can add this pocket to any item of clothing , and make it just the size you need!
Here's how:
Step 1.
Get the item of clothing you want to add your pocket to,
2 pieces of fabric the size of the pocket you want
and 1 zip the size you want!
Step 2.
Place one piece of the pocket fabric on the outside of your clothes item where you want it to be, and pin into place.
Then using a pencil and ruler, draw a rectangle where you want the opening for the zip to be - use your zip as a guide for the size:
Step 3.
Machine stitch around all sides of the rectangle you have drawn...
and then cut a line down the centre of the rectangle (through both pieces of fabric)
Cut the corners like this:
Step 4.
Push the pocket through to the back of the main clothes fabric. If you like you can press this to help you keep it flat:
Then pin the zip into place, so the part you open is showing through your new hole!
Stitch around the zip using the zipper foot on your machine to get nice and close:
Step 5.
Turn to the back of your pocket - and pin on the other piece of pocket fabric:
Then stitch around all 4 sides to enclose the pocket!
DONE!
Now pop in your keys and phone - and head on out for a lovely walk!
For the downloadable PDF version of this tutorial, click here.


Wow! You're good! Thanks for stopping by... I'm now following you too!! :) Have a great week!
ReplyDeleteWhat a great tutorial! I'd never have thought to do a pocket like that. Now I have to check what clothes in my wardrobe need pockets!
ReplyDeleteYou make it looks easy!! Thanks for the directions!
ReplyDeleteAndrea
www.addicted2tutes.blogspot.com
Visiting from the Alexa Hop! I'd love a visit back. Happy 4th!
ReplyDeleteI love that you just added a pocket to a pair of shorts like it was no big deal!! I would have no idea how to do that. Great job.
ReplyDeleteBeautiful idea! You did a great job! Thanks for sharing. Love your projects...very unique and creative!
ReplyDeleteHope to see you on my blog:)
You do make it look so easy. Great page! Following from the Lower Your Rank Alexa Hop and would love if you would follow me back at http://generationsofsavings.blogspot.com/
ReplyDeleteI'm awarding you The Irresistibly Sweet Blog Award. Click to see - http://www.weidknecht.com/2011/07/i-won-award.html.
ReplyDeleteThank you so much for participating in Monday Mingle. Please come back every Monday to link up your website or blog. I would love to connect with you on Facebook too! http://facebook.com/toughcookiemommy
ReplyDeleteGreat tutorial. Thanks for sharing.
ReplyDeleteHello my name is Jennifer and I just wanted to let you know that I have featured your tutorial on my blog. Please let me know if there is any content that you wish for me to remove. Cheers
ReplyDeletewww.eatcraftsow.blogspot.com
You have inspired me to try a zipper. I have never sewn one before. Stop by to link up your post on my Tips for Tuesday blog.
ReplyDeleteI am not very good at sewing in zippers; what a great tutorial!
ReplyDeleteThank you so much for the follow. I'm following you now.
Traci
I have used this technique many times on bags and purses, but have never thought to do it on clothing. Great idea! Thanks for sharing!
ReplyDeleteI will definitely be trying this technique. I never thought about sewing the pocket on the outside first. And I LOVE the 100+ upcycled clothing page. Following back from We Did It! Wed.
ReplyDeleteI really appreciate this tutorial. I've been struggling to put inner pockets into the handbags I've been making and this looks so much more easier than what I've been doing before.
ReplyDeleteThat is too clever and what a wonderful tutorial.
ReplyDeleteyou make that look so easy!
ReplyDeleteThanks for the follow. I am now following you as well. have a great day!
ReplyDeleteJessica
This is great! Zippered pockets would be good for the kiddos so their stuff doesn't fall out when they're romping!
ReplyDeleteGreat little tutorial! I just found this project through Craft-o-maniac! I love it and I'm your new follower.
ReplyDeleteI'd love if you would join us over at Sew Woodsy and link up this tutorial!
Thank you for joining the Frugal Tuesday Tip! http://juliecache.com/2011/07/04/frugal-tuesday-tip-24
ReplyDeleteMaybe we'll see you again?
this is so great! thankyou!
ReplyDeleteI have always been intimidated by zippers, but your tutorial not only makes it look doable, it actually looks fun. Thanks for sharing this with us:)
ReplyDeleteThat's awesome!!!!
ReplyDeleteGreat tutorial!! Thanks for linking @'Sew Cute Tuesday'! I'll be featuring you tomorrow, so be sure to stop by and grab a 'featured' button!
ReplyDeleteLike I said before... this is awesome! Thank you for linking up to Sew Woodsy last week. We hope you will join us again tomorrow!
ReplyDeleteNice idea! How do you keep the pocket from rolling up on the inside when its empty?
ReplyDelete