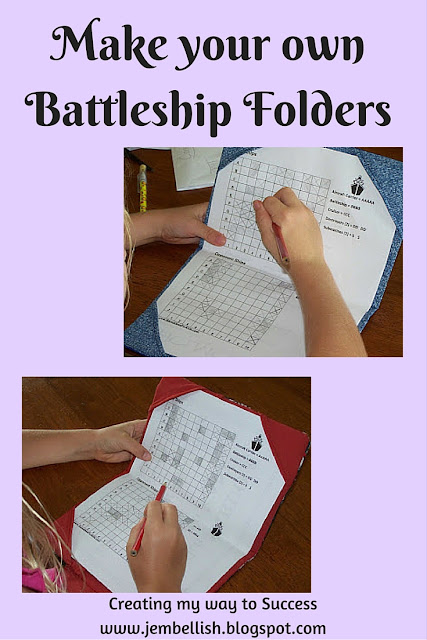
Battleships folders - a tutorial


Just recently I've rediscovered playing Battleships through teaching the game to my girls.  Now I'm not talking about the new fangled computer version, but the good old-fashioned pencil and paper version! See this post on my other blog - Be Our Best for more details about the game itself!

Anyway - playing this game again, inspired me to make some special little folders to hold the papers in and that the girls can use for playing the game!

I decided to shy away from the usual pinks and purples I work with for the girls..

And here's one in action! (they had to play a game as soon as they saw their new little folders!)


There is a little slide in pocket for a pencil in the centre - and space to store finished games or extra notes..


They're nice and simple to make - and could be used for things other than battleships too - like wordsearches, sudoku, crosswords, or just plain paper for writing or drawing!

First the materials:
2 pieces of stiff card - 14 x 22 cm (5.5 x 8.75")
1 piece outer fabric - 34 x 24 cm (13.5 x 9.5")
1 piece inner fabric - 34 x 24 cm (13.5 x 13.5")
1 piece inner fabric- 34 x 12 cm (13.5 x 4.75")
1 piece inner fabric - 16 cm square (6.25" square)
1 piece each inner and outer fabric for flap - 10 x 6 cm (4 x 2.25")
sew in velcro 6 cm (2.25")

First of all, attach one piece of the velcro to the inner fabric flap piece - about 1 cm in from long edge, and centrally placed.

Then sew around three sides of the flap pieces (right sides together) and trim the corners.


Turn right sides out, and topstitch close to edge.


Attach the flap to one end of the outer fabric (right sides together and centrally placed) then attach the other half of the velcro on the other end, 2cm  ( 1")in from edge and centrally placed.

Take the inner fabric piece (34 x 12 cm)/(13.5 x 4.75")  and double turn then stitch one of the long edges.

Take the 16 cm (6.25") square piece of inner fabric and double turn and stitch all 4 edges:

Then fold diagonally and cut like so:

Then you need to pin all the inner pieces of fabric on top of the largest piece like this:
And stitch securely in place.

Now place the two pieces,right sides together. Pin and stitch around 3 sides, leaving the edge with the flap open.

Turn right sides out, and push the first piece of card all the way in, then stitch along the edge of it to hold in place.
Make another line of stitching 2 cm  (1") further along - this will form your pencil pocket.

Push the remaining card into the other side, fold the edges of the fabric inside and stitch closed.
DONE!
Add the pencil...
Add the battleships sheet (you can download one for free here)
Or a wordsearch, crossword or something else (fits A4 paper)
And use it!!


For the downloadable PDF version of this tutorial, click here.

Have fun playing!


Scrappy Friday - book cover tutorial

Today I'm cheating a little and showing you a project I did months ago, which counts as a scrap project as it used up an old waistcoat I was never going to wear! Which means I can also use it on my clothes upcycling project page!! Yippee!
Anyway, back to my project, which was to sort out my recipe book - and revamp it with a nice new cover!

Here's the before...


And the after....

And here's how I made the cover:

First I chose my fabric - a waistcoat I was given, loved the fabric but was never likely to wear it!
 

Then I just placed the open book on the fabric, and cut around, leaving about 3cm above and below the book, and enough on either side for the flaps over (about 10cm on each side in total)

Then I double turned and stitched each edge to neaten. (As you can see my pinning is rather rough, I do smooth it out more when I machine stitch!!)

Next step is to place the book open and central on the fabric, which should be right side facing upwards. 
Fold one side flap over and pin at the top and bottom above and below the book.

Fold the other side flap over, but don't pin yet!

Because the material  will stretch as the book closes, shut the book now, allow the material to give into the bend of the book and pin the top and bottom of the flap above and below the book.


Stitch the top and bottom of both flaps about where your double turned edges end.
Your cover should now look something like this:


Next turn the book cover right side out, and fold down and pin, the middle parts at both the top and bottom.

Top stitch this to hold it down in place.

Your book cover is now finished and ready to slip your book into!


The side flaps can also be used as little pockets to slip notes into - or in my case here, new recipes cut  from magazines!


With the remaining scraps of fabric from the waistcoat - I covered a couple of sections of drainpipe to make little storage containers!

And the other, using the fabric inside out, which was a fabulous gold colour. It's the perfect size for holding those important kitchen utensils!


So there you have it - a mini tutorial for using up those scraps (or an old piece of clothing) to brighten up your favourite book!


Jill

My Creative Space

This weekend coming, my husband is off to Perth for a sizeable family reunion.  Unfortunately the girls and I aren't going ( we'll make up by having a good fun girlie weekend!).
It was also his parents 60th birthdays recently, so I wanted to make them something special that he could take over for them this weekend.

The girls have drawn them some fabulous pictures for the family, but my drawing skills aren't up to much, so of course I decided to stitch something!

I made them a kind of table runner, with our daughters' (their granddaughters') handprints, names and the year appliqued on.
Since I sent them a set of fabric Great Barrier Reef coasters I made for Christmas, I thought I'd stick with the same colours, so they would all match.
Here's some snapshots:


I also made (by request) a set of  conversation coasters for my husband to take with him. I made these recently and posted a tutorial (click here)


The family question coasters I made several weeks ago are used by us daily - and loved by our girls - they set the table with them face down in everyone's setting so each question is a secret till asked! It has really helped us find out more about our girls' days at school - instead of the 'nothing' or 'don't remember' response that is often the reply given when asked directly! answering the question on a coaster is much more exciting and so produces a much better response!!
 Since I was making more of these coasters, I made another family set with different questions on for us to keep too.


Fabulous sparkly purse!

I recently found this great website called 'You Can Make This', which has tons and tons of patterns, tutorials and how tos.
I subscribed to their free newsletter and recieved a bunch of tutorials for free.
One of them was for a gorgeous Debut purse from Kimberbell kids, which I just had to try out.
Here's my finished purse:


And hanging on our gecko's tail...


I used a couple of vintage buttons I got in a big jar at a school fete last year.

What do you think?
Here's an outside shot - now that the sun's shining!


I love my new handbag - and my eldest daughter just spied it and wants one too! No doubt the younger daughter will too when she gets home!
It was pretty easy to make, and didn't use up much fabric - mainly bits from my scrap box! so I think in the upcoming school holidays that could be a new project for them!


Scrappy Friday - sewing machine cover

Today I wanted a quick, easy and useful project that would use up some of the small squares of fabric I cut months ago, and that have been sitting in a box waiting to be used since then.

For a while now, I've been thinking of making a cover for my sewing machine.  We have our ceiling fans turning constantly throughout our house, and the dust does get blown onto everything!

So  - remembering I wanted a quick, easy project - I just grabbed the squares and started sewing them together in no particular order:


I sewed them together into strips..


Each strip was long enough to wrap half-way around the base of my sewing machine.


Then I sewed the strips together...


Again in no particular order - easy and quick, not worrying about matching colours or the lines of the squares!

Then once I had large rectangle, I cut a matching sized piece from an old curtain lining I had.


With each rectangle, I folded them in half, right sides together, stitched down the sides, then reaching inside the fabric, I flattened each corner to a triangle and sewed across - to 'box' the corners out. I then cut off the triangle corner beyond my stitching, and repeated with the other corner, same for both pieces of fabric.


I then put the pieces one inside the other - wrong sides together and turned the edges over to hide the raw ends.  And stitched it all closed!


And voila!! A new sewing machine cover - made from lots of very small scrappy squares - and an old piece of curtain lining!


Not bad for a super fast project....


There's my trusty little machine peeking out from it's new cosy cover !


Not bad - for a throw it together job! And it's practical, useful and does the trick!!