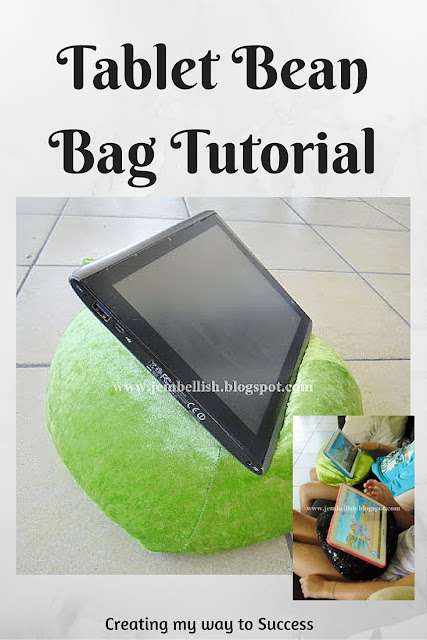
Just before Christmas I saw a link on someone's blog for an 'iCrib bean bag'. I'd never heard of this before so went to have a look. Well - what a great idea! My girls saved up for months and with help from some extra Christmas money from us, just before Christmas bought themselves Samsung Galaxy Tablets.
So I was then looking for something small for them to open on Christmas day, since they already had their main presents! These bean bags seemed perfect - so I decided to make them one each!
I couldn't post this tutorial before Christmas as my girls do look at this blog sometimes - but it's all clear now so here's how to make a Tablet Bean Bag of your very own!
You will need:
Fabric for the inner bag and outer bag
(1 yard or 1 metre of each is plenty)
A zip - 30cm (12") or larger
Bean bag filler balls
1. Cut pieces for the inner bag.
Cut a circle, 30cm (12") in diameter, and then you need 4 triangles. For these first cut a rectangle, 24 x 30cm (9.5 x 12")
Then fold the rectangle in half along the long side and cut from the top fold to the bottom open end like this:
Open this out and you can use this triangle as your template to cut 3 more the same:
Here's what you should then have:
2. Stitch inner bag together
Take each triangle and stitch right sides together one by one along matching long sides:
IMPORTANT! In one side leave a gap of about 10cm (4") to use to fill the bag with beans through!
Once you have joined all 4 together, join the outer edges of the outer triangles together so the triangles make an open bottomed pyramid.
Now take your circle of fabric and fold into quarters. Use a pin to mark each quarter fold on the outer edge of the circle.
Then pin your open pyramid piece right sides together to this circle - matching the seams to the pins:
Stitch around the whole circle.
3. Fill with beans!
Now turn out your bean bag through the gap you left in one of the triangle sides:
Now fill your bag around three-quarters full with beans.
(I used a funnel and jug to do this, and did it all inside a big plastic bag to try to avoid getting small while balls all over my house!!)
Hand stitch the opening closed
And your inner bean bag is finished!
4. Make outer bag cover.
Essentially you now just make another bean bag the same that you put this bean bag inside. The outer bag is removable and washable.
Cut the same pieces as for the inner bag, plus a strip
20 x 10cm (8 x 4") for the handle.
Here is also when you need your zip.
First take your strap rectangle and fold the long edges to the centre, then the whole thing in half to hide the raw edges. Then stitch down both sides:
Then place your handle folded in half near the top of one of your triangle pieces and stitch into place like this:
Now join your 4 triangles as you did for the inner bag, but this time there is no need to leave a gap in any side.
Next take your circle and fold then cut in half:
Place the zip face down on the right side of the fabric along one of the cuts you just made.
Using the zipper foot on your machine, stitch the zip into place.
Now turn the zip over and top-stitch to prevent the fabric catching in the zip when you open and close it.
Repeat this with the other side of the zip and the other half of your circle.
Then make sure your zip is open and pin the circle to your triangle pyramid as you did for the inner bag and stitch it all together.
Turn right sides out through the zip opening!
Now slip your bean bag inside it's cover and zip it up!
And you're all ready to go - sit comfortable with the bean bag on your lap and your tablet on your bean bag:
My girls love using their new bean bags...
Which double as small head pillows when they aren't using their tablets!
Now I need to make one for myself!!
For the downloadable PDF version of this tutorial, click here.
Do you have a tablet? Do you have a nice little cushion for it to sit on when you're using it?
Why not try making one for yourself or a friend - I borrowed one of these to read my first e-book over the holidays, and found it just perfect to read comfortably!
And if you enjoyed this tutorial, then why not take a look at
There are over 100 tutorials for all levels of sewing ability.

.jpg)

.jpg)
.jpg)
.jpg)
.jpg)

.jpg)
.jpg)

.jpg)


.jpg)
.jpg)
.jpg)
.jpg)
.jpg)