

Today I want to show you how to make this very cute watermelon pencil case. My girls love pencil cases and it seems you can never have too many!
So here goes. You'll need scraps of red, white and green fabric, a zip, some black buttons and some paper and pencil.
To make your pattern - simply draw a slice of watermelon. Don't worry about getting it perfect - fruits are not all exactly the same size and shape! Here's mine on an A4 sheet of paper:
.jpg)
You cut out this whole slice you have drawn and use it as the pattern to cut your inside fabric - two pieces. Remember for each piece you cut - cut a little wider than your pattern to allow for the seams:
.jpg)
Next, to cut the pieces for the outside of the pencil case, cut along the lines of your pattern for the red, white and green parts to be separate. Then use these 3 pattern pieces to cut your coloured pieces of fabric for the outside of your pencil case - again remembering to cut wider than your pattern piece to allow for seams. Cut two of each colour.

Now you need to pin then sew each coloured piece together in turn. Remember to pin right sides of the fabric together - and use plenty pins to keep the curves in line!

To add the seeds to your watermelon slice - simply stitch on some black buttons in random spaces. Remember to do this for both sides of the pencil case!

The Zip
My zip was about 24cm (9") long. you can use a longer or shorter one, and use scrap fabric to cover both ends to make it the same width as your watermelon slice. Here's how.
Take rectangular scraps of whichever fabric you like - I chose my inner red fabric. Place 2 pieces right sides together on either side of the zip, pinning where you want the zip to end. Stitch these pieces in place, and trim the very end of the zip off.
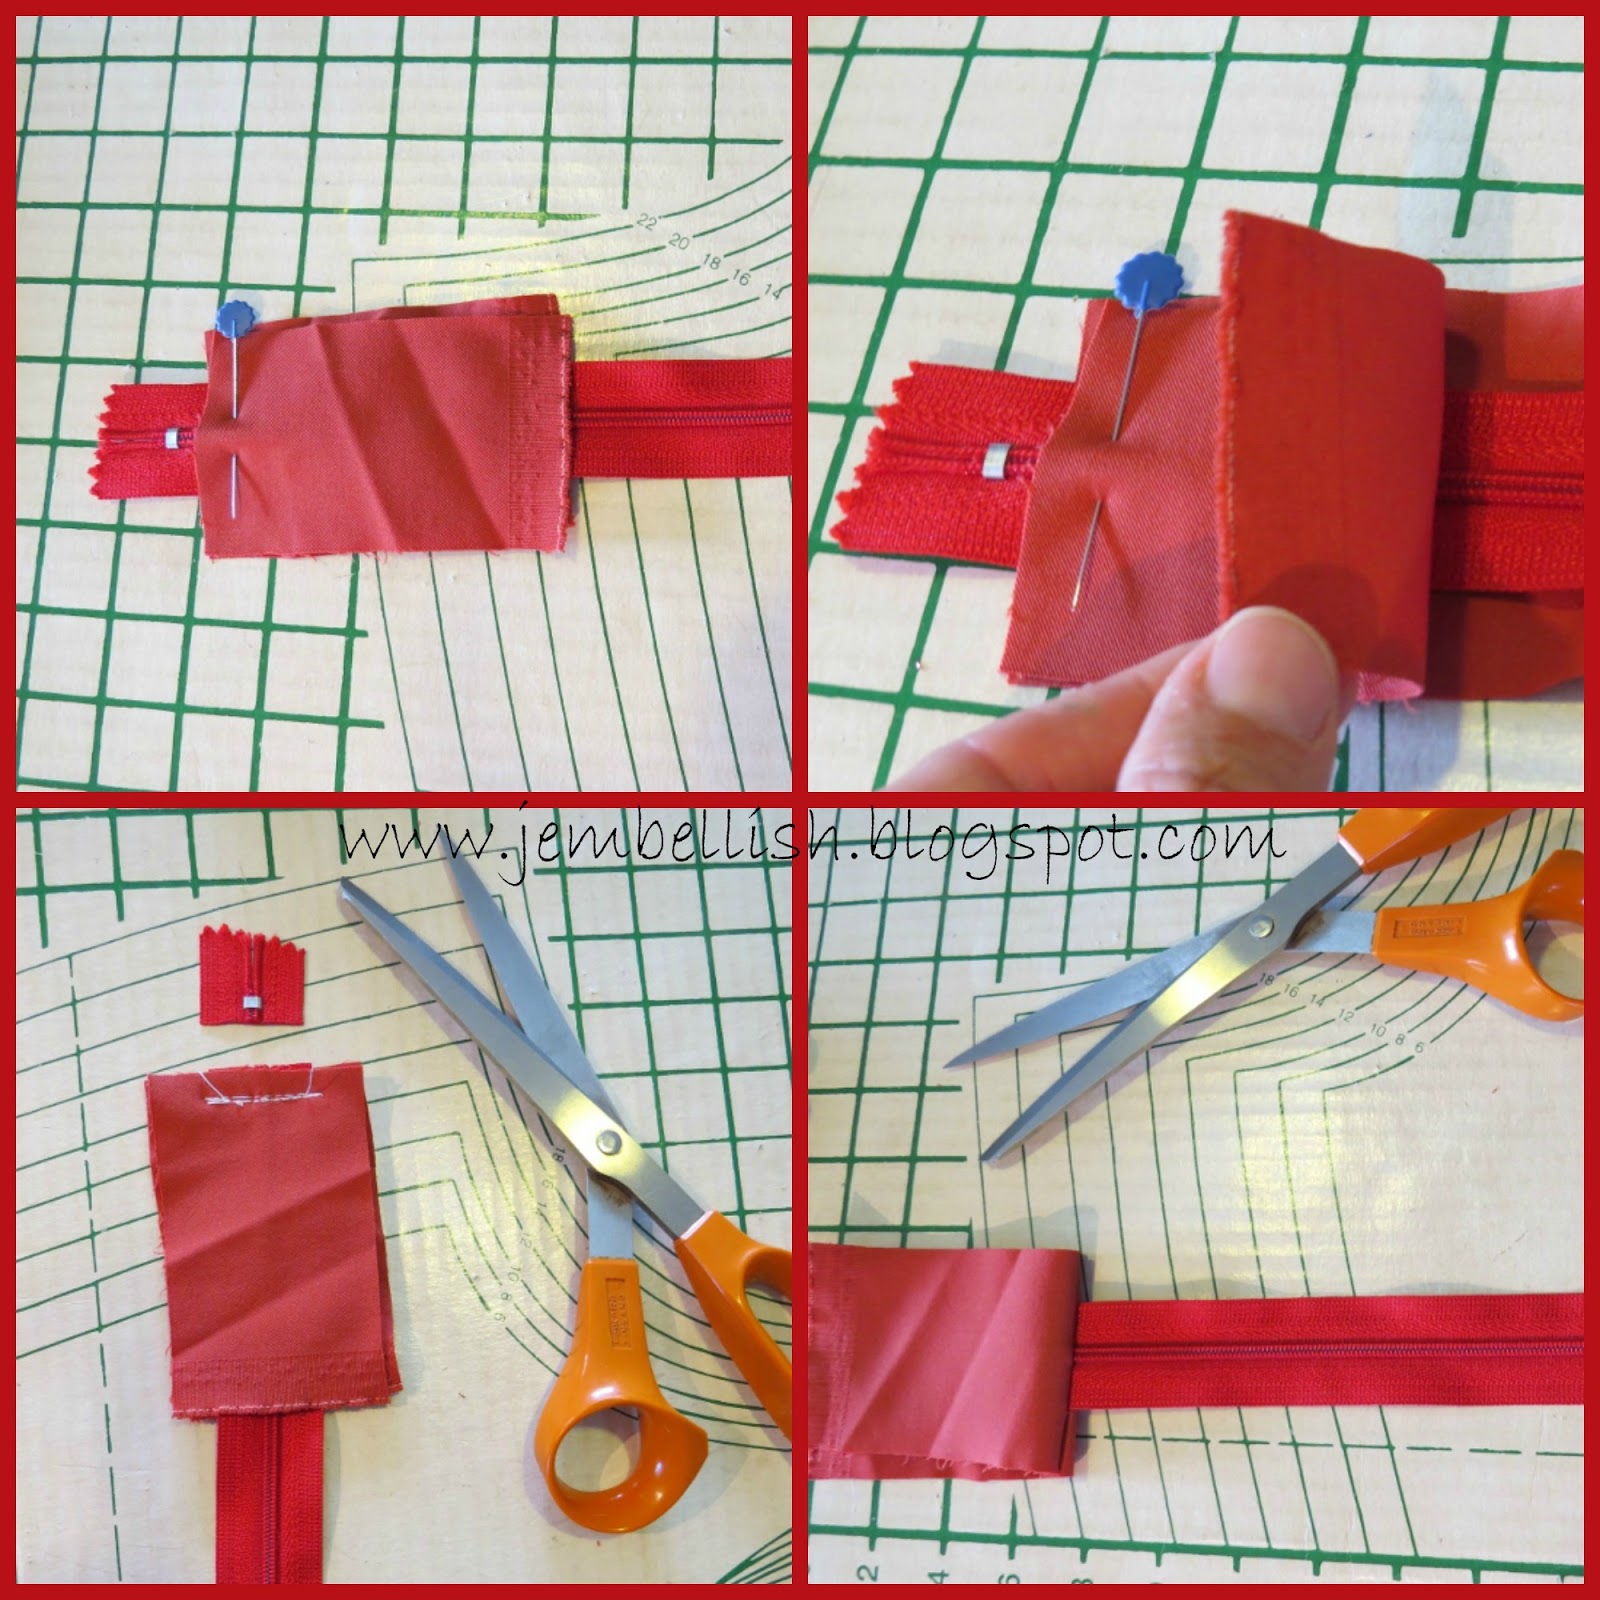
Repeat this with the other end of the zip - then trim the edges of the fabric in line with the zip:

Putting it all together
Lay one side of your watermelon slice face up. Place your zip face down on top, then one of your inner fabric pieces right sides down on top of that. Pin then using your zipper foot stitch close to the zip teeth.

To prevent the fabric catching in the zip, open out the fabrics and pull back from the zip. Top-stitch along the edge of the zip.

Now the other half of the watermelon slice. Place your other inner fabric piece face up. Then the part with the attached zip face up on top. Finally your other watermelon slice face down on the very top - face down. Pin and stitch with your zipper foot, and once again pull the fabric back from the zip and top-stitch the other side.

Now open out your pencil case with the zip in the middle. Make sure the zip is open. Then flip over fabrics so you have both inner fabrics on one side and both outer fabrics on the other side. Pin these pieces together around the curved edges. Leave a gap of a few inches on the inner fabric side. You'll need this to turn the pencil case out.

Stitch all the way around the edges - just leaving the gap for turning out. Turn the pencil case right sides out - and pin then stitch the opening closed:

Done! Congratulations, you've made a cute watermelon pencil case!

For the free downloadable PDF version of this tutorial click here.

I hope you liked this tutorial.
There are many more on

So do take a look!

This is such a fun idea! I love it!
ReplyDeleteTina
Thank you Tina!
DeleteAdorable, Jill! What a great tutorial! Thanks for sharing!
ReplyDeleteHave a wonderful week!
Hugs and love from Portugal,
Ana Love Craft
www.lovecraft2012.blogspot.com
Thanks Ana. You have a great week too!
DeleteJill, This is super cute. Also the tutorial is really good. Thanks for sharing all these fun sewing tips and helps!! So hope you are doing well. :) Much care
ReplyDeleteThanks Becky! Hope all is well with you too!
DeleteFun pencil case! Thanks for the tute.
ReplyDeleteThanks Fay!
DeleteLove this watermelon pencil case, such a great idea :)
ReplyDeleteThanks for sharing at Creative Mondays, will be featuring this next week :)
Thanks Clairejustine!
DeleteJill, what a great tutorial! I love this project, it is an original idea.
ReplyDeletePinned for future reference. Thank you for sharing with us the ...."how to"
Have a beautiful day.
Marisa :)
Thanks Marissa!
Delete