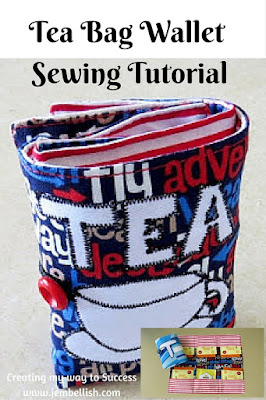
I've been wanting to make myself one of these for a while - just because I think they're cute and a neat idea, and I think they'd make a great stocking filler gift!
It wasn't until I'd finished making both of these that I realised I'd made them so the closure is on the left side instead of the right.
When I showed them to my younger daughter she said, "They're Japanese!!" (Japanese books open from the left!)
So here's how to make your own, 'Japanese' Tea Bag Wallet.
You will need two different fabrics, some elastic (I used a hair tie) and a button. I also used a left over scrap of appliqué fabric for the "T"
Cut 2 rectangles of your main fabric 26 x 22 cm (10.25 x 8.75")
2 rectangles of inner fabric 26 x 7 cm (10.25 x 2.75")
First take your smaller rectangles - these will be your pockets.
On one of the longer edges for each piece, double turn the edge and stitch to completely hide the raw edges.
Now place these pieces face up on the top and bottom edges of one of your main fabric pieces. The double hems you just stitched should be facing the middle. Pin, then stitch around the 3 outer edges on each
Now to stitch the pockets.
Measure 3 pockets each 8 cm (3.25") wide. Mark with pins then stitch lines to form the pockets.
Take your elastic and fold in half. Place it on the top left side at the edge of the pocket. The folded elastic loop should be around 3.5 cm (1.5") long. Stitch securely in place.
Now take your other outer fabric piece. Fold it in half lengthways and place the pocketed piece below it like this. Now you can see where your middle panel will be on your outer fabric. This is where you want to stitch your button and if you want, your appliqué.
Now it's time to put your wallet together. Lay your two main pieces face up next to each other.
Place one piece face down on top of the other.
Pin then stitch around all four edges, leaving a gap in one side to turn the wallet right sides out.
After stitching. trim the corners before turning right sides out.
Iron the edges flat and the opening neatly closed.
Then top stitch all the way around all four edges.
To close your wallet, fold the bottom half up.
Then fold the right side in.
Then the left side over.
Finally, loop the elastic over the button to secure.
There you have your very own Tea Bag Wallet!
Fill with six of your favourite Tea Bags!
I made another wallet with travel fabric and appliquéd a tea cup on the outside.
I plan on taking this one on holiday with us, with my favourite Earl Grey Tea Bags inside!
What kind of Tea Bags would you fill yours with?
For the free downloadable PDF version of this tutorial, click here.
If you liked this tutorial, I have over 100 Free Sewing tutorials for all levels of sewing ability and for all kinds of different things.
Take a look at My Free Tutorials Page.


Oh Jill, this is a great idea. I'm thinking stocking stuffing for Christmas, or even a great gift for someone who travels and would like to have their teas with them!
ReplyDeleteThanks Agy! They will be stocking stuffers here this year for sure! :)
DeleteI love your step by step by tutorial! I agree with your daughter; having the closure on the left is kind of funky and hip.
ReplyDeleteI'm hosting a link up over at my site and I'd love for you to link up with us! http://winsteadwandering.com/the-alder-collective-link-party-no-1/
Thanks Abby! I'll come and visit your party!
DeleteGreat gift idea!! I've got a Craft Gossip post scheduled for this evening that links to your tutorial: http://sewing.craftgossip.com/?p=84814 --Anne
ReplyDeleteThanks so much for the feature Anne!
DeleteThank you or this great, free tutorial. It's very clear with excellent instructions. I receive your blog posts in my email and totally enjoy your creative tutorials. I guess I'm gushing, but keep up the great work!
ReplyDeleteAw thanks Laura - so glad you like my tutorials!! Plenty more to come! The more I make the more ideas seem to pop up!
DeleteA great thing for me to have at work. It has captured my mind. I'll make it for sure and give a link here in the comments about my results.
ReplyDeleteThank you! I look forward to seeing your version of this wallet! :)
DeleteSo cute....Thank you for sharing at the Thursday Favorite Things blog hop
ReplyDeleteThank you!
Delete