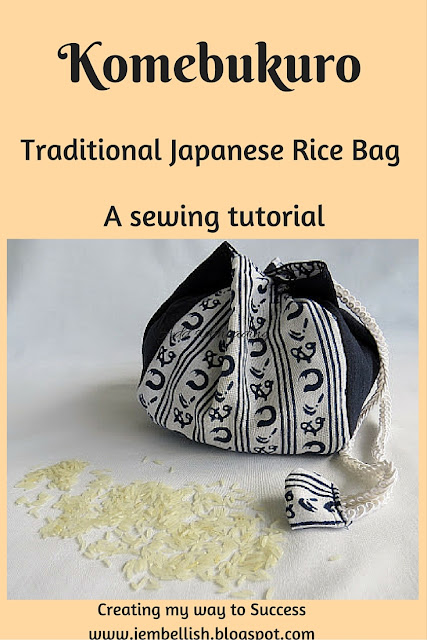
A Komebukuro is a Japanese cotton drawstring bag that was used to carry offerings of rice to Japanese temples or shrines. The word literally means rice (Kome) - bag (bukuro).
I have some Japanese fabrics in my stash and thought this would be a great project to use some of them:
Here's how to make your own:
You will need:
Fabrics of your choice. I used denim for the base square, and two different cottons for the main bag parts.
Cord for drawstring.
Cut 10 squares of fabric the same size,
2 for the base,
4 for the outer bag
4 for the lining
1. Lay out your squares as you want your bag to look with the base piece in the centre and the sides around each edge like this:
2. Pin, then stitch each piece to the base, right sides together:
3. Next you need to stitch each side together.
(Again right sides of the fabric facing each other.)
Turn right side out and now you have a small boxy bag:
4. Repeat Steps 1-3 with your remaining squares. This will make the lining of your bag.
5. Place one bag inside the other like this:
Then fold the both the outer and inner bag tops inwards to hide the raw edges:
6. Pin then top-stitch all the way around the top:
7. On each side of the bag near the top - mark with pins where you want the drawstring to go through. If you like you can measure and place these perfectly evenly, but I just eye-balled it.
8. Stitch 2 buttonholes in each side near the top where you have pinned. Then thread the cord in and out around the top of the bag through the buttonholes.
9. To hide the ends of the cord drawstring, take a scrap of one of your fabrics and fold it in half, right sides together; then stitch down both sides.
10. Turn right sides out and push in the ends of the cord into the little pocket you just made.
11. Tuck the raw edges inside the pocket, then stitch carefully across the top to secure.
12. Your Komebukuro is now finished!
You can choose different fabrics for the outside and inside as the bag is reversible!
And you can make these bags any size you like simply by changing the size of the squares you cut!
And you can fill them with whatever you choose! It doesn't have to be rice!!
For the downloadable PDF version of this tutorial, click here.
And for lots more of my free sewing tutorials take a look at


Very cute, and simple enough
ReplyDeleteThanks Elsie!
DeleteGreat tutorial!! Thank you!!
ReplyDeleteGreetings from Spain!!
Thank you and thanks for stopping by!
Deletevery good tutorial, so sweet komebukuro!!
ReplyDeletehttp://freestilcreatingbyvilly.blogspot.gr/
Thanks Anastasia!
DeleteFantastic tutorial Jill, thanks I have saved this for later.
ReplyDeleteThanks Merry!
Deletegreat tutorial.thanx...
ReplyDeleteThank you!
DeleteAlways nice to learn something new. Great tutorial!
ReplyDeleteThank you Bella!
DeleteThis is so cute ~ thank you so much for sharing at this week's Project Inspire{d} ~ pinning to our party board.
ReplyDeleteHave a great week.
Thanks Mery Beth! And thank you for pinning!
DeleteGreat tutorial, love these :)
ReplyDeleteThanks for sharing with us at Creative Mondays ...
Thanks Clairejustine!
DeleteInteresting post, great job:) Greetings
ReplyDeleteWow, what a great tutorial! You've done a fabulous job!
ReplyDeleteThanks Marilyn!
DeleteYou've been featured on homework. Thank you for sharing your project on The Inspiration Board.
ReplyDeleteOh wow thank you so much Carolyn!
DeleteLOVE the tutorial Jill!!
ReplyDeleteThanks so much for sharing this at The DIY Dreamer! See you tomorrow evening! :)
Thanks Christine! I'll be back with my next project linking up at your party!
Deletei love this bag.... i would like to make this one in silk or silk like fabric
ReplyDeleteWhat a great idea! Silk would be perfect for this bag!
DeleteThis is a wonderful bag!!! I was making Japanese Furoshiki's for some time now. This is an excellent addition. You have inspired me..
ReplyDeleteThanks Billie!
Delete