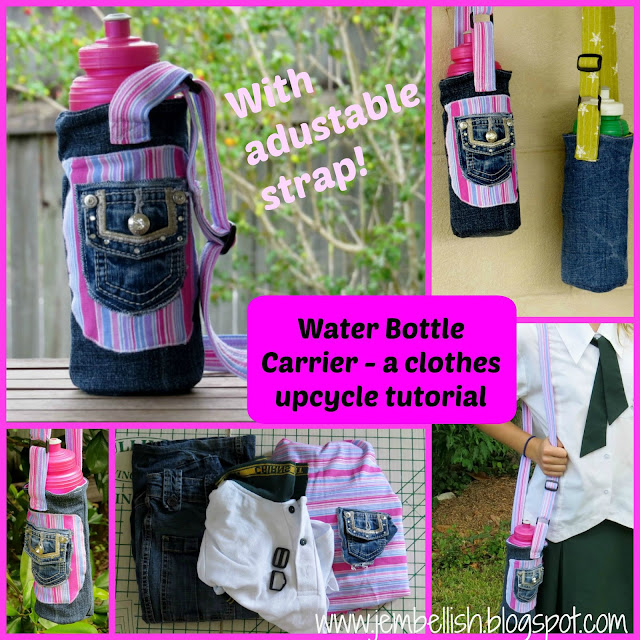
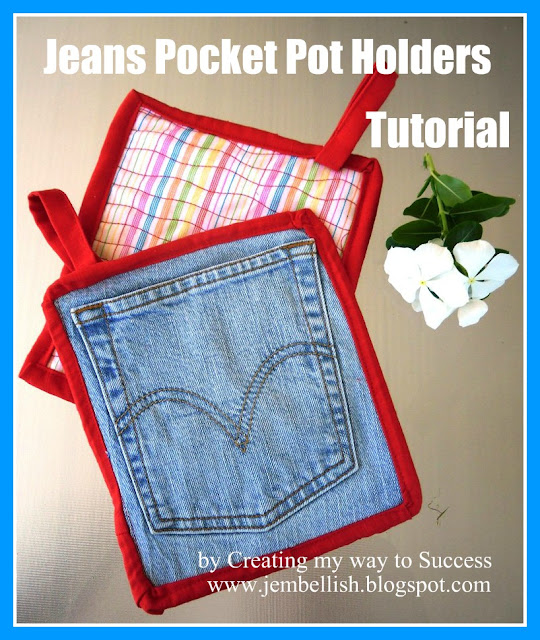
7 Adorable ways to Upcycle old Jeans


Do you have an old pair of jeans that you never wear, don't fit any more or have holes in them?
Don't throw them away - upcycle them into something you can use!

Here are 7 great ideas, using large and small pieces, or even just the pockets! So many things you can make.


If you like these ideas - there are heaps more sewing tutorials on my Free Tutorials Pages.  Many can be made using old jeans or other clothes - or in fact any fabric you choose!
There are over 100 tutorials to choose from for all levels of sewing ability. Please take a look here.


Ginger Oat Cookies


These are one of my favourite cookies to bake. They are super simple and taste really good with a nice cup of tea!
My girls love them in their lunch boxes too.

Here's how to make them.

Ingredients

8 oz (200g) Margarine or Butter
2 dstsp golden syrup
6 oz (150g) demerera or raw sugar
4 oz (200g) SR flour
8 oz (200g) Porridge Oats
2 rounded tsp ground ginger


Preheat oven to 160 C  (320  F) Gas No 3
Melt the margarine and syrup together then add to the dry ingredients. Mix well then roll into balls and flatten on a baking tray.

Bake for 10 - 15 minutes.
Makes around 30 cookies.


As I mentioned earlier - they are delicious with a cup of tea!


If you like this recipe - why not take a look at the other recipes I've shared too! Click here.


What I learned from Crocheting a Dish Scrubbie


This week in my 2016 quest to learn to crochet, I made myself a couple of dish scrubbies.

I've been browsing my Crochet Pinterest Board to find things to make and settled on this pattern on Ravelry for a spiral scrubbie.

The pattern looked fairly straightforward, and there was also a Youtube video of the tutorial which I watched as well.

You basically crochet a diamond shape and then stitch it together to form the spiral scrubbie.

My first attempt went a little wonky.

It took me a while to 'understand' what I was doing with the pattern.
In the end it was a very straightforward - increase the row by 2 stitches on one end, and decrease by 2 on the other end.
It's all worked in single crochet.

I learned that it can be very important where you put your crochet hook in the stitches. For this scrubbie - you have to crochet in the back loop to create ridges in the crochet - just what you need for a scrubbie!!
So I learned what the 'back loop' is 
(working this crochet from right to left)

So here's my first finished scrubbie. Despite being a little wonky, once stitched it seems to look OK.


I had to make another one straight away to try and get it more even, and reinforce what I'd just learned.
This one turned out much better - although I had fewer stitches in each row at the end than I started with. Not sure how I managed that...


Stitching it together is very straightforward - you fold the corners over to make a tube, stitch that, then weave around both edges of the tube and pull tight to create the round scrubbie.  I also added a chain stitch loop on this second one as mentioned on the PDF version of the pattern, so I can hang this one up!


So there you have my two crochet dish scrubbies.

I timed myself making the second one and all up it took 45 minutes. 
(I was just curious as to the time)

I'm very pleased with this week's crochet creations and am looking forward to using them and seeing how effective they are at cleaning my dishes! Maybe I can persuade my girls to be the official 'scrubbie testers'  They might think washing dishes is more interesting with pretty coloured scrubbies to use!


I haven't yet decided what to try making next week - any suggestions welcome as always!


A new duffel bag for my daughter.


I love when my daughters ask me to make things for them.
Last week, my eldest asked if I could make her a new swimming bag. 

I made both my girls duffel bags for swimming about three years ago.  This is the one I made my eldest - when it was brand new.

Since she swims almost every day, this bag has had a lot of use and now looks very well worn.

So - only to happy to oblige, I got out my fabric for her to choose what she wanted and whipped up this new one for her!


2 Handles


Plus a shoulder strap


The inside is fully waterproof fabric, important for soggy towels and togs! Plus there's one zipped pocket too.

The duffel bags are made using my free 


The pattern covers 4 sizes as shown in the picture above.
The swimming bag I made for my daughter was a slightly different size - the measurements for that can be found here.


I also have over 100 other free sewing tutorials available for all levels of sewing ability and to make all kinds of different things.
You can browse them all here.


Spicy Vegetable Bread


Here's another savoury recipe that is great for a lunch box snack.


Ingredients

115 g (4 oz) wholemeal plain flour
115 g (4 oz) plain flour
1.5 tsp baking powder
0.25 tsp salt
60 g (2 oz) butter
115 g (4 oz) grated zucchini
90 g (3 oz) grated carrot
1 tblsp chopped fresh rosemary
70 g (2.5 oz) grated Parmesan
1 egg
3 tblsp mayonnaise
3 tblsp Worcestershire sauce
1 tblsp sesame seeds


Preheat oven to 190 C (375F), Gas No 5.
Mix flours, baking power and salt together and rub in the butter.

Add zucchini, carrot, rosemary and 3/4 of parmesan.

Beat together the egg, mayonnaise and Worcestershire sauce.

Pour into the dry ingredients. Mix well.


Spoon into a greased and lined 1 kg (2 lb) loaf tin. Smooth the surface level.

Sprinkle with remaining parmesan and sesame seeds.


Bake for 40-45 minutes, bread should be still moist.


Best served warm.


This bread is so tasty - crisp on the outside and soft and moist on the inside!

If you liked this recipe, see what other recipes I have shared here.


A Crochet Owl


I've been doing some more crochet practice this week and made this cute little owl!

I used this great tutorial from Bunny Mummy.  It used only stitches that I've already learned, and what I loved most about the tutorial was that it had both pictures and written steps.

I think I did pretty well, other than miscounting the ear part at the top of one part. Can you see it looks a bit wonky on the left side?

Still, overall I'm very pleased with my owl. 
I'm going to call him Barry!

So far it's a motley collection of bits and pieces I've made.

I'm not sure what I'm going to do with all these things yet, but I shall keep everything I make over the year and hopefully can see my progress as the weeks and months go by!