Showing posts with label stash busting. Show all posts

Learning how to make a T-shirt Quilt


I've challenged myself to use up my fabric and crafting stash - not just some of it, but ALL of it! Yep, probably a crazy challenge, but I've reached boil over point with having too much stuff and an extreme solution seems to be the way to go!

I've done a couple of smaller projects already - and this is my first bigger one - to use up a box of t-shirts I've been saving when my daughters discard them as being too small or just not 'cool' anymore. 
I did have the idea that in the future I would make some kind of quilt for them out of the t-shirts. So with my new challenge I thought, 'why wait?'. It's winter here now in Cairns and a blanket or quilt would at least be used instead of a box of t-shirts just sitting in the cupboard!


T-shirt Upcycling

So, here's what I started with:

All kinds of shapes and sizes of designs, logos and pictures. Should make for an interesting quilt/rug if I can get it right! Hopefully not just a messed up mish-mash.

First I have cut and ironed all the designs from the t-shirts. I cut them roughly at first, then neatened the edges of each one to square them off.

The pieces are all kinds of sizes, and I also have one piece with a rounded top - it was a singlet PJ top and I cut as far out from the design as I could! I don't want to cut any of the design off to make it square, but I'm not sure what to do about the rounded top...any suggestions welcome!


A quilt, a rug or maybe a blanket?

I randomly laid out the pieces, then rearranged them to get this.

The four 'columns' of t-shirts are roughly the same width, and I think I can trim all the pieces to make them fit reasonably evenly together.

I tried to spread the colours out, but other that that, there is no reason for this ordering of the t-shirt pieces other than sizes.


How to put them together?

So there you have where I'm at now. The next step is to put the pieces together into a quilt/blanket.  

I've been checking out some posts online to see how other people have made their t-shirt quilts. Here are some bits and pieces of advice I found:


One suggestion is to cut your t-shirt pictures out and then use fusible webbing to attach them to a backing fabric and applique around them.

Sashing is another way to work around different sized pictures. This simply means adding extra fabric around the pictures to make them into the right sized blocks for your nice even sized quilt.

Some tutorials say to use iron-on interfacing on the back of each t-shirt picture as the fabric is stretchy. This should then make the blocks easier to sew evenly.

Then there is finishing the quilt around the edges. Do you stitch it all wrong sides together, quilting as you go, then add a binding around the edges?  Or stitch the front and back right sides together and then top-stitch around the outside and quilt afterwards?
Or a third option is to stitch the front and back together block by block, folding the seams over and top stitching as you go around each block.


Please Help!

Have you every made a t-shirt quilt? Do you have any advice, suggestions or opinions as to how I should continue with this project?

I have some soft knit fabric from my stash that I'm going to use for the backing, basically because it's a piece big enough to use and a nice soft fabric for a blanket/quilt.

Please leave me a comment below.
 I'm ready to get stuck into putting this 't-shirt' quilt together!


UPDATE!
I've now finished my t-shirt quilt. You can see the finished quilt, plus a photo and written tutorial - and my first ever video tutorial, showing how you can make one of your own here!


Decluttering, Stashbusting, Use What You've Got


Declutter and Stashbust

We all feel the need to declutter our houses at times, and all you crafters and sewers out there, I'm sure there are plenty of you like me that have an enormous stash of fabric and 'resources' that is probably far bigger than your needs and every now and then you do a bit of  'stashbusting'.

Well, I do a lot of both decluttering and stashbusting, but I still seem to have just as much 'stuff' as I did a few years ago! 


What I have in my stash

My fabric stash consists of 5 x 55L boxes of larger pieces of fabric. That's 575L of fabric!  Sounds (and looks!) like an awful lot!!

Then there's my boxes of fabric scraps - those smaller pieces that I'm sure will be useful for plenty of little projects. All nicely colour coded and packed into 6 smaller boxes that sit under my sewing desk.


Then of course there's all the other things I keep for crafting projects. I see all kinds of cool projects on Pinterest that I think I'd like to try. I also save things that I don't want going to landfill; that seems like such a waste, when I could instead create something cool with them!

So I have lots of..

Plastic Bottle Caps.


CDs


Corks


Bread Tags and Bottle Caps


Pieces of Drainpipe


Of course endless notions for sewing - zips, buttons, clips, rings, anything that might be useful.

And then there's the clothes - always so many old clothes that I can't bear to through out or give away. Plus, a lot of my friends know that I upcycle clothes and they've started passing their old ones on to me, saying, "I thought you could make something with this"!!


Previous challenges

Back in 2011, I started my clothes upcycling with a month long challenge. I looked at the pile of old clothes I was accumulating and decided I needed to do something about them. I completed that challenge, sharing something every day in May that year that I'd upcycled. Finishing off with a stuffed fabric monster to use up the last of the scraps on the final day! One month, a large box of clothes - success!


Then last year I set myself a challenge to upcycle a HUGE pile of clothes I got from our school carnival, into things to sell at the carnival the following year. Here's what I started with.

I spent about 9 months sewing and creating. I had lots of fun, produced plenty of new sewing tutorials and in the end had a whole stall full of upcycled things to sell.

You can read about how that all went here if you're interested.

So I thought that I've done it before with a big challenge to 'use things up', why not try doing the same with my enormous stash of fabric and crafting resources?


Where did the stuff come from?

My fabric stash has largely come from charity shops, remnant boxes and a large chunk from a lovely old lady I used to know from when I had a market stall at the local shopping centre. She also had a market stall where she sold kids clothes that she sewed.  She quickly learned that I used up fabric scraps, so used to bring bags of hers to the markets and pass them on to me.
A few years ago, she moved away from Cairns to live in a retirement village further south near where her children live.  When she was preparing to leave, she was clearing her house out, and had a very impressive fabric stash to get rid of.
She showed me through her house - all the cupboards and drawers were crammed with fabric. She told me that when her husband died, she just filled up his sides of the cupboards with fabric!
I left her house with a whole car full of all kinds of fabric - and sewing and crafting books too!


I was thinking about this lady, my stash and my constant feeling just now that we have 'too much stuff'.  
What am I saving it all for?  It's not as if I'm looking forward to my retirement where I can sit and craft and use everything then.  When our girls grow up and leave home, we want to travel, go and explore, do, see and live an active and exciting life! Crafting and sewing is more what I'm doing at this stage of my life - with my kids at home to share that and learn things with me too.


Too much stuff

I like the idea of having a clear house, with lots of space and not so much 'stuff'.   

I thought lots about this when my parents visited us recently from the UK.  My parents always want to help us out where they can, and kept asking if they could buy us things - just small things and gadgets that they thought might make our lives easier - gadgets for the kitchen, new mugs to replace the ones we have that are chipped, new  things to replace those that are getting old and less efficient.

I felt a little ungrateful turning these offers down, but I just don't want or need more 'stuff' in our house.  I'm working on slowly decluttering and getting rid of things, the last thing I need is people working against me filling our house up with more stuff!! I have two kids to do that!!


Use what you've got

So that leaves me with my fabric and crafting stash and what to do with it.  I don't want to through it away - too wasteful and damaging for the environment.
Neither do I want to give it away for it to just sit in someone else's cupboard for years.  
So I've decided to use what I've got!  To make all these cool things I've saved oddments for, try out new crafts. Sew more things for us, for family, for friends or to sell or give away.

The size of my stash makes it quite overwhelming to set a time limit on it just yet, so I'll start with just using something up every week - and I will post about it to keep me accountable.

Maybe you have things stashed away too for projects that you've wanted to try for a long time but never gotten around to it!
Then why not join in in some SERIOUS STASHBUSTING!

Use what you've got 

and finally get 

A Round Tuit!!  


Do you think it's too large a goal to use up my stash completely?
Am I crazy?
Would you attempt to use up your entire stash?
I'd love to hear your thoughts - and if anyone is inspired to do any stashbusting of their own, no matter how small!


Better storage - a quick fix


This kitchen drawer is ridiculous. Too much stuff (story of my life) and consequently a mess!

The plastic bags you see (greenish in colour) are special bags for the fridge to keep veggies and herbs in to keep them fresh. My mum brought them out from England for me years ago and they work so well - but I'm not very good at folding them after washing them and putting them in the drawer, they tend to get 'stuffed'.

So - for ages now I've been meaning to make a soft bag to hang them in. That way I can just 'stuff' them in the bag when they're clean and dry and they're out of the way.

Finally, this week, I was browsing through my very own Round Tuit Linky party and decided it was time I myself got around to it. That is to making one of those cloth bags with elastic at either end.
It only took me about 10 minutes to make, and now my bags are all tidily hung up in the corner - out of the way.


And my drawer is tidy again!

I've had that idea for months now - shocking that it's taken me so long to do it, especially since it only took 10 minutes!
Plus it used up a little bit of my enormous fabric stash! Always a bonus.

What jobs are you putting off that you could get done in a jiffy!

Come on - time to get A Round Tuit!!

Hee hee!!

Jill

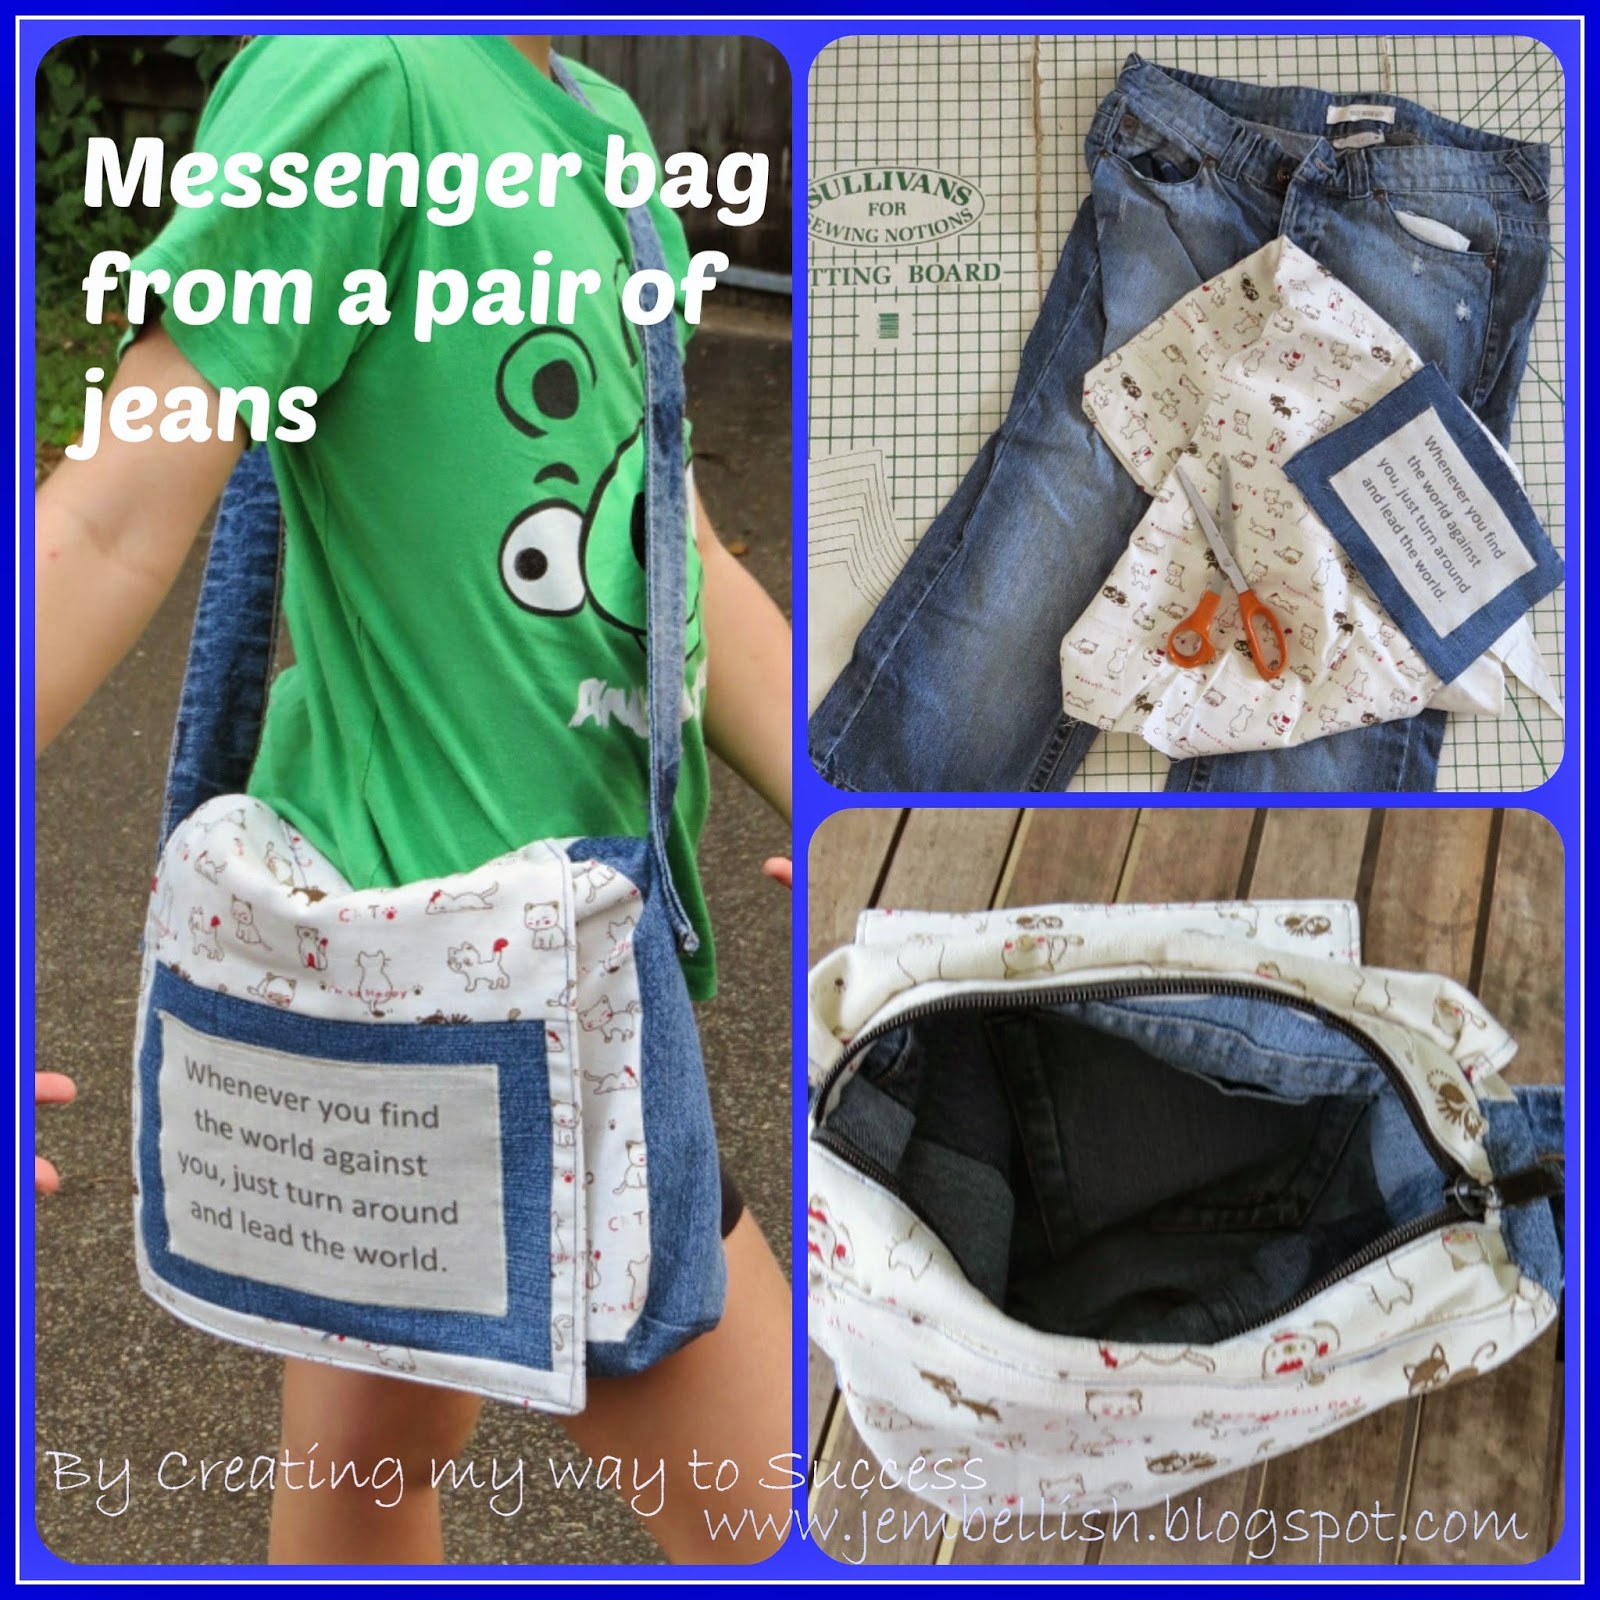
Messenger bag from jeans - continuing stashbusting


This week I continued stashbusting - using a pair of jeans and some co-ordinating fabric, plus a quote I printed onto fabric several months ago and hadn't used!


I followed my own tutorial for 


I cut out all my pieces ok,

but had a bad sewing day and had to use my quick unpick LOTS!
I think after weeks away I'm a bit out of practice with the sewing. Or maybe it was just one of those days...


But I made it in the end and I'm really happy with the finished bag!


Now what to do with it! My girls of course tried to claim it as soon as they came home from school - suggesting we could have it as a communal bag that everyone can use!

I'm thinking of building up my stock as I stashbust this year, and having a market stall or an etsy shop later when I have more things. We'll see.

For now - I'll just keep on sewing and use up that fabric stash!

If you need any help using your stash up - there are over 

And you can follow along here on my blog or on Facebook for heaps more creative - and particularly upcycling ideas!

I shall be linking this to many of the fabulous linky parties whose pretty buttons are on the bottom of this page and direct links on my linky party page.

Stashbusting start


This week I've made a start on my massive fabric stashbusting challenge for the year. 
I'm still catching up from our big holiday and getting the girls back to school, so I wanted to start with something easy.

I sorted my fabric at the end of last year and worked out a rough plan of what to make with things.

This pile of fabrics is ones I'm not so fond of.

I decided to use them to make some fabric wrapping clothes (furoshiki) and fabric gift bags.

I have a wrapping box full of left over gift wrapping paper, ribbons, gift bags, old cards to be used as tags - and also some wrapping clothes. We try to keep our gift wrapping environment friendly!

So now we have some more wrapping cloths:

Some simple gift bags which can be tied with ribbons or scrap fabric:

And also a couple of gift tote bags.

At least now this fabric can be put to use, and also prettied up with ribbons, colourful scrap ties - and I also plan to make plenty fabric flowers from my scrap fabric that can be added to our gift wrapping box.

All in all a good start to my stash-busting!
I just need to keep chipping away at the pile - a little each week!

Have you done any stash-busting lately?

Jill