Showing posts with label Scrappy Friday. Show all posts

Purse from kids top - clothes upcycling challenge day 20

Today's quick upcycle project is from a very small top that no longer fits either daughter - and they've grown out of the character depicted on it too!  Perhaps another - "why did I keep this one??"
Still - it was in my box, so I made this little purse:

Nice and cute!
Here's the top I used (sorry forgot to take a picture before I started cutting!)

And this tiny zip that seemed too small for anything..

But was just perfect for this tiny Dorothy the Dinosaur purse!


I have a 2 year old niece who I'm sure will appreciate this - and her hands will be small enough to reach through the zip to put her little treasures inside!

That's it for today.  Only 11 days left of my challenge - and my box is getting emptier and emptier!  I"m wondering why I kept some things for so long - mental note to upcycle immediately and not procrasinate for years with future clothes items!
But I'm learning lots as I go which is great!


Scrappy Friday - Day 6 of upcycling clothes challenge

Today I have a scrappy project to show you which also upcycled an item of clothing from my stash too!

I was asked to make a drawstring bag for my daughter's class at school.  This term they are studying pets, and have two pet mice in the classroom:


Have you ever tried to photograph mice? They just won't stay still!!!
 (and my camera broke last week so I'm using my phone camera - good excuse anyway!!)


Anyway, the bag is for two stuffed cuddly mice and a book and diary, which a different child will take home each week.
I didn't want to make just a plain bag - I wanted it a bit special.  Here's what I came up with:


Nice to make something not so pink for a change!
I had to give it a nice shiny gold lining!!


Here's the close up of the patchwork.  I used up lots of scraps - different fabrics and textures,


The mice fabric came from an old necktie (see - I got in my upcycling for the day!!)


What do you think??  A bit of a special drawstring bag for my daughter's class! I hope they all like it!


Have you ever upcycled neckties??
Do you have any ideas on what to do with them? I still have lots left in my box!


Thanks for stopping by - do come back again tomorrow, for my next clothes upcycle!


Scrappy Friday - last bag!

 Over the last few weeks I have been organising my boxes of colour coded fabric scraps, and also making myself a few bags using these coloured scraps!  This week I finished my last box, and last bag!! Yippee!! - great to finish a job, and see all my scraps now neatly folded into their boxes so that I can finally see what I've got easily!

So here's my final - green - bag!


A couple of pockets inside...


And a ruffly flower on the front for decoration!


So now I've got a bag to match every outfit!  For those of you who missed the last ones, here's the other colours...
Red.


Yellow.


Blue.


And purple.


Not bad for bunch of scraps!!

So now that I've sorted my scrap boxes, my next project is to use up all the old clothes that I've saved to upcycle!  The piles are growing and it's time to stop planning and start doing!! 
So May is the month - every day I will post an upcycling clothes project!
I've decided that committing to post about it every day on here, will be my best motivator to stick to the job and get it done!!
Why not join me - stop by any day in May to see what I'm upcycling.


Have a lovely weekend - and hope to see you back soon!


Scrappy Friday - an Easter bag

 Recently I've been working my way through my colour fabric scrap boxes, organising, sorting and creating bags from different colours.  This week I decided to make an Easter coloured one:

All made from my scraps, and a few fabric yoyos I made a while ago


I added some pockets inside too..


Very spring like! (even if it is autumn in the tropics - I think it feels spring like with the humidity gone, the air feels a lot 'fresher')


What do you think?
I've only got one coloured box left to go! Come back next week to see what I made with my green scraps!!


And I hope you have a great weekend!


Scrappy Friday - a red bag!

Perhaps going a litle 'bag-crazy', I made another one this week with my next colour coded scrap box to be sorted - red! ( I cheated this time and used my black box too!)
I made it a little bigger than the other two - there are times when I need a bag that can fit in a couple of little water bottles, a snack, and a few other things aside from just my purse, phone and keys!

Here it is:


Although it doesn't show up in this photos- the middle plain red stripe is actually sparkly! (I love anything that sparkles!)
Here's an outside view in the sunshine..


And all three scrap bags so far - purple, blue and red/black!


I'm on a roll with these and it's helping me sort through my scraps with a project for each colour!
Do you think a girl can have too many bags?  Surely I should be prepared for any occasion and outfit?
How many bags do you have?


Scrappy Friday - another new purse!

This week I've decided to make something from my 'blue' scrap box.

Cute, don't you think?
Especially the lining fabric!


I was inspired by a comment a friend made last week on a Sparkly purse I made.  I was wearing a purple top when she first saw it, and said that I'd have to make one for every colour in my wardrobe so that I would always match!
So here's the blue..


And here's the purple...


I wonder how many variations I can come up with as I work my way through the colours of scraps I have...


Scrappy Friday - book cover tutorial

Today I'm cheating a little and showing you a project I did months ago, which counts as a scrap project as it used up an old waistcoat I was never going to wear! Which means I can also use it on my clothes upcycling project page!! Yippee!
Anyway, back to my project, which was to sort out my recipe book - and revamp it with a nice new cover!

Here's the before...


And the after....

And here's how I made the cover:

First I chose my fabric - a waistcoat I was given, loved the fabric but was never likely to wear it!
 

Then I just placed the open book on the fabric, and cut around, leaving about 3cm above and below the book, and enough on either side for the flaps over (about 10cm on each side in total)

Then I double turned and stitched each edge to neaten. (As you can see my pinning is rather rough, I do smooth it out more when I machine stitch!!)

Next step is to place the book open and central on the fabric, which should be right side facing upwards. 
Fold one side flap over and pin at the top and bottom above and below the book.

Fold the other side flap over, but don't pin yet!

Because the material  will stretch as the book closes, shut the book now, allow the material to give into the bend of the book and pin the top and bottom of the flap above and below the book.


Stitch the top and bottom of both flaps about where your double turned edges end.
Your cover should now look something like this:


Next turn the book cover right side out, and fold down and pin, the middle parts at both the top and bottom.

Top stitch this to hold it down in place.

Your book cover is now finished and ready to slip your book into!


The side flaps can also be used as little pockets to slip notes into - or in my case here, new recipes cut  from magazines!


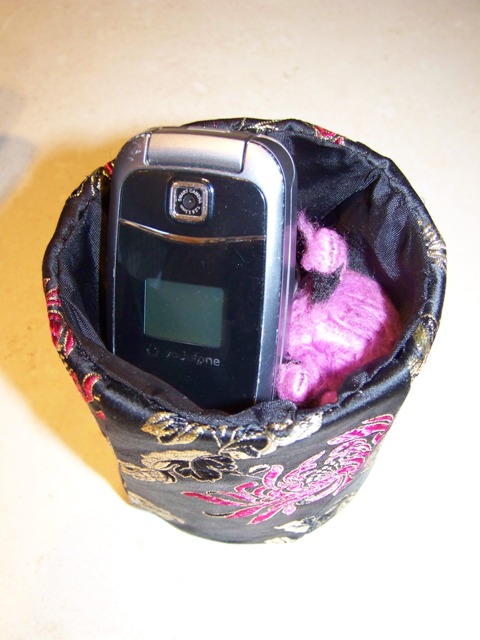
With the remaining scraps of fabric from the waistcoat - I covered a couple of sections of drainpipe to make little storage containers!

And the other, using the fabric inside out, which was a fabulous gold colour. It's the perfect size for holding those important kitchen utensils!


So there you have it - a mini tutorial for using up those scraps (or an old piece of clothing) to brighten up your favourite book!


Jill