

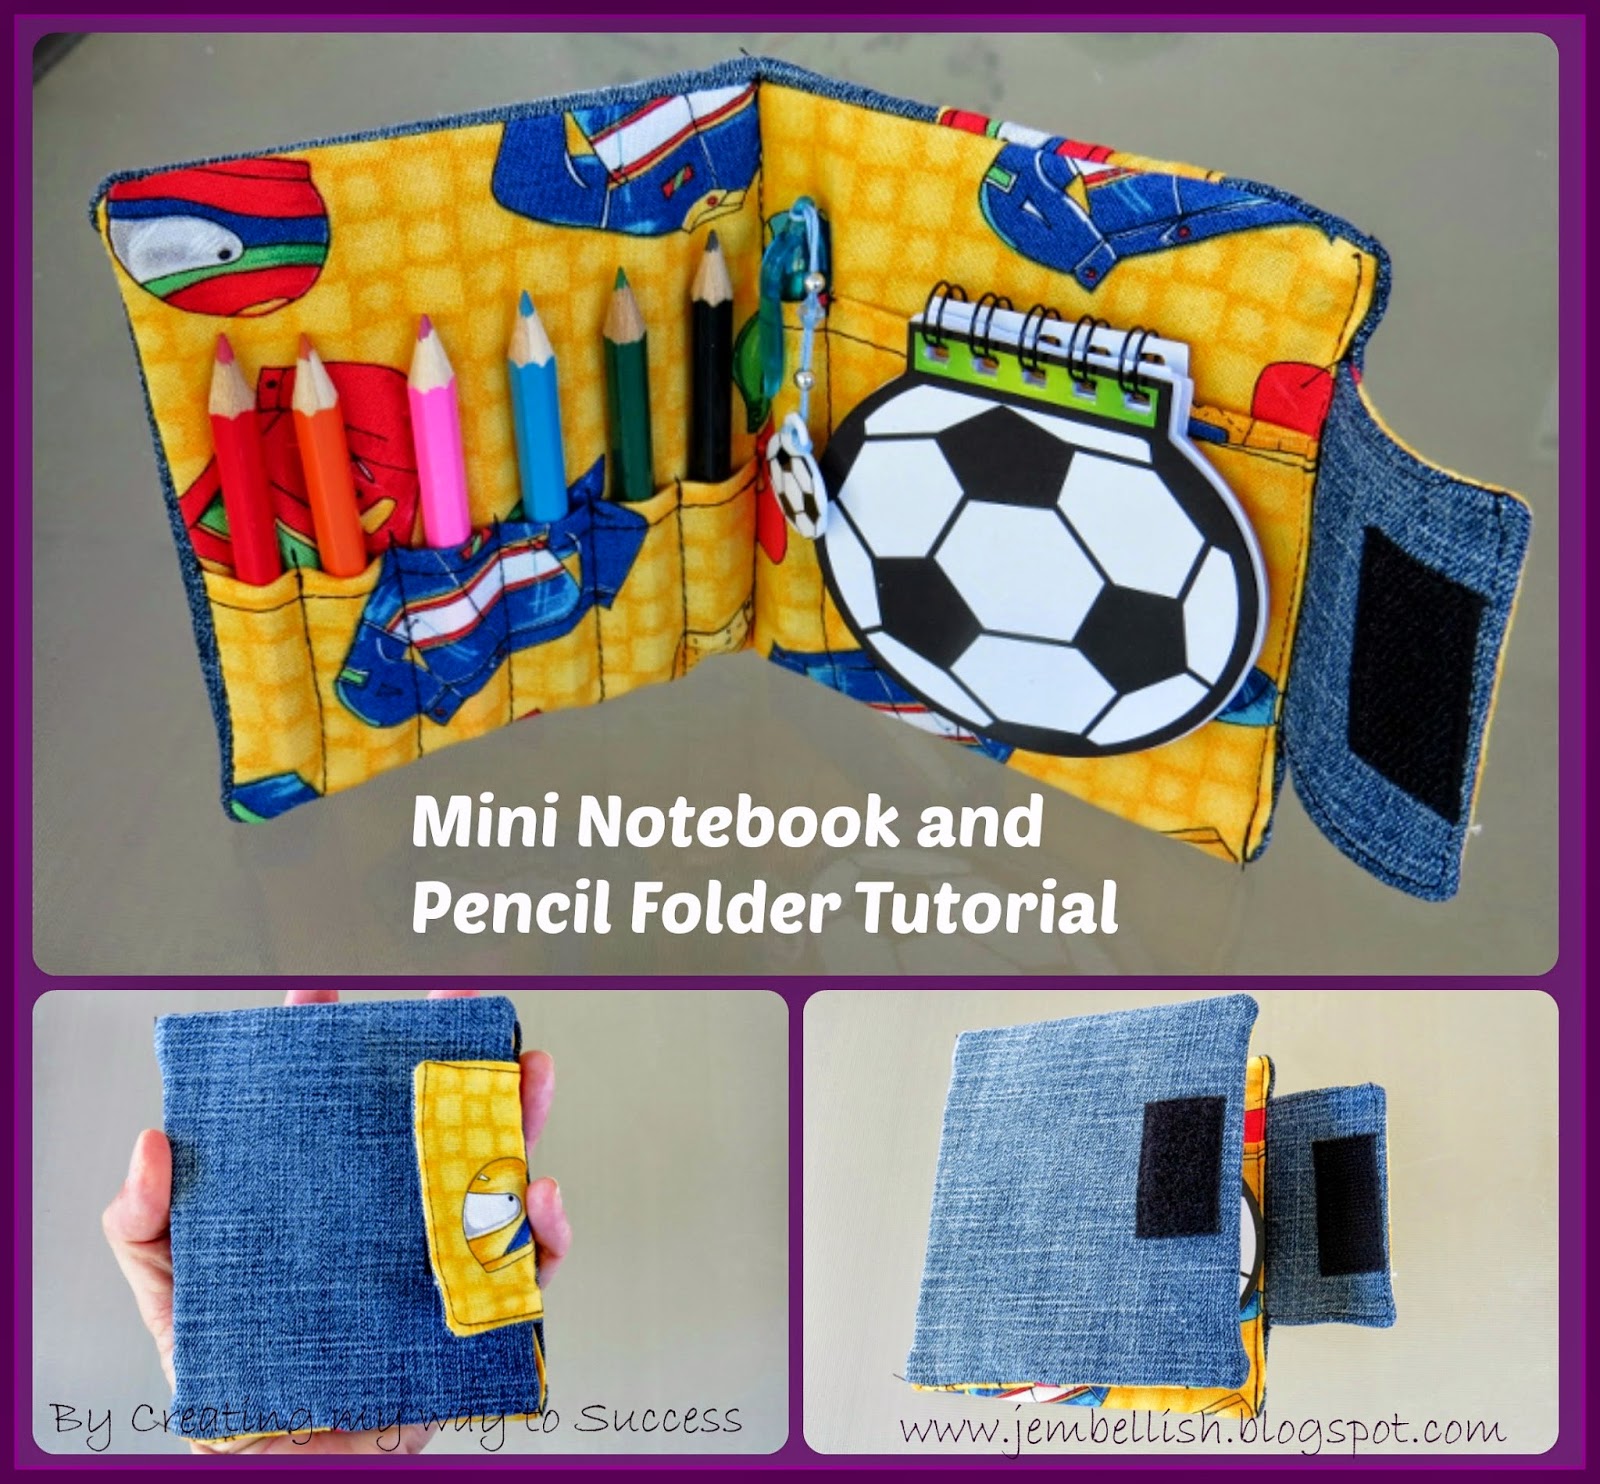
These cute little notebook and pencil folders are just a miniature version of my earlier tutorial. The older tutorial is a little dated, so I thought I'd make a new one for these mini ones with the smaller measurements.
This is a great project for using up fabric scraps - and another great way to use denim from old jeans!
Materials needed:
.jpg)
2 pieces stiff cardboard 10 x 12cm (4 x 4.75”)
2 outer pieces fabric (denim) 12 x 14 cm (4.75 x 5.5”)
2 pieces inner fabric (patterned) 12 x 14 cm (4.75 x 5.5”)
1 piece inner
fabric (patterned) for pencil pockets 12 x 7cm (4.75 x 2.75”)
1 piece inner
fabric (patterned) for notebook pocket 12 x 12cm (4.75 x 4.75”)
For outer feature strip, inner fabric (patterned) 14 x 5cm (4.75 x 2")
For flap to close:
1 piece each inner (patterned) and outer (denim) fabric 9 x 5cm (3.5 x 2”)
1 piece Velcro 4cm (1.5”)
First place the piece of inner fabric for your feature strip centrally on one of the outer denim pieces. Fold the edges under and pin into place then stitch.
.jpg)
Pin one half of the Velcro to the inner fabric
piece of the flap, just in from the long edge and centrally placed. Stitch into place.
.jpg)
Place the two pieces of the flap, right sides together. Pin and sew along 3 sides, leaving the long side opposite the velcro open.
.jpg)
.jpg)
Trim the corners
.jpg)
Turn right sides out then top stitch around those 3 edges.
.jpg)
Now pin the other half of the velcro to your other outer fabric piece (the one without the feature strip). Pin 1.5cm (0.75") in from the long edge and centrally placed. Stitch into place securely.
.jpg)
Now place the two outer fabric pieces right sides together and stitch down what will be the spine of the folder:
.jpg)
Next pin the flap to the back of your outer fabric - centrally placed and with the velcro facing up like shown here. Stitch into place.
.jpg)
Now take your inner fabric pocket pieces. Double turn and stitch the top edge of each pocket to neaten the raw edge.
.jpg)
Pin to the larger inner fabric pieces, and stitch down the sides.:
.jpg)
Now take the side with the larger notebook pocket and slide in your notebook on the right side. Pin, then stitch along the edge. This will hold the notebook more securely in its pocket and also form an extra pencil slot:
.jpg)
Then take the side with the smaller pocket and mark even spaces for your pencil slots. 1.75cm (0.75") apart.
.jpg)
Stitch down these lines to form the pencil pockets. Stitch a little over the pocket edge on each line to give the pockets extra strength at the top.
.jpg)
Place these two inner pieces right sides together and stitch along what will be the spine of the folder.
.jpg)
Now you have your inner and outer fabric pieces done - time to join it all together.
.jpg)
Place the inner and outer pieces right sides together and pin around 3 edges. Leave the edge with the flap open.
.jpg)
.jpg)
Stitch around the edges, then trim the corners and turn right sides out.
.jpg)
Slide one piece of cardboard in between the outer and inner fabric. Then pin down the centre of the folder and stitch along the spine.
.jpg)
.jpg)
Finally, slide the last piece of card into the right side of the folder. Fold the end edges in on themselves to hide the raw edges and top stitch.
.jpg)
.jpg)
Now you have a finished pencil and notebook folder all ready to fill up!
.jpg)
Add a small notebook and some coloured pencils and you have the perfect little gift.
.jpg)
.jpg)
.jpg)
.jpg)
For more sewing ideas and projects see -

There are over 100 to choose from for all different sewing levels and abilities.

This mini version is a handy size, Jill. Great tutorial, as always.
ReplyDeleteThanks Pam!
Deletevery cool indeed!
ReplyDeleteThanks Sue!
Delete