

My two daughters both learned to play chess at school a couple of years ago, and they play quite often with our wooden chessboard set.
If you're interested in reading more about the game of chess itself and the benefits of playing it, click here to read the post on my other blog - Be Our Best.
We've had in our cupboard for some time now, another old set of chess pieces and an old chessboard that came from my husband's childhood in Scotland. Although we do have a set that is used, it seemed a shame for the other set to sit there in the cupboard all unused and unloved! So I decided to transform it into this:


Hopefully now it will get used! - I think it looks more attractive than before, don't you?


I found the black and white checked fabric in the remnant clearance box in a local fabric store months ago, and have been wanting to try something like this with it!
If you have an old set of chess pieces, and can find some black and white fabric like this, then
here's how to make one of your own cool fabric chessboard sets:
First gather your materials :
Black and white checks, fabric for the inside surround, and the backing, and some elastic.

Here's what you need to cut:
(Note - the sizes may vary depending on the size of the squares on your fabric, or to suit your chess pieces mine had 3cm squares)
1 piece chessboard fabric - 10 squares across and up (1 more all around than the actual chessboard)
Inner fabric:
2 pieces 35.5cm x 16cm
2 pieces 52.5cm x 8cm
2 pieces for ties, one 32cm x 8cm, one 42cm x 8cm
Outer fabric: 35.5cm x 52.5cm
4 pieces of elastic each 35.5cm long

First you need to 'frame' the chessboard with the inner pieces of fabric.
Take the longer pieces first (52.5cm x 8cm)
Folding the long edge under by around 1cm, pin it along the outer line of the board (the central 8x8 squares)


Then topstitch in place, as close to the edge as you can:

Now you need to pin the two wider inner fabric pieces into place along the other edges of the chessboard, so it's completely surrounded:

Again fold the edge under by around 1cm, before pinning in place:

Topstitch into place as before, as close to the edge of the chessboard as you can.
Next you need to add the elastic to hold your chesspieces in place.
Pin the strips of elastic 3cm and 8.5cm down from the chessboard on the wider edges like this:
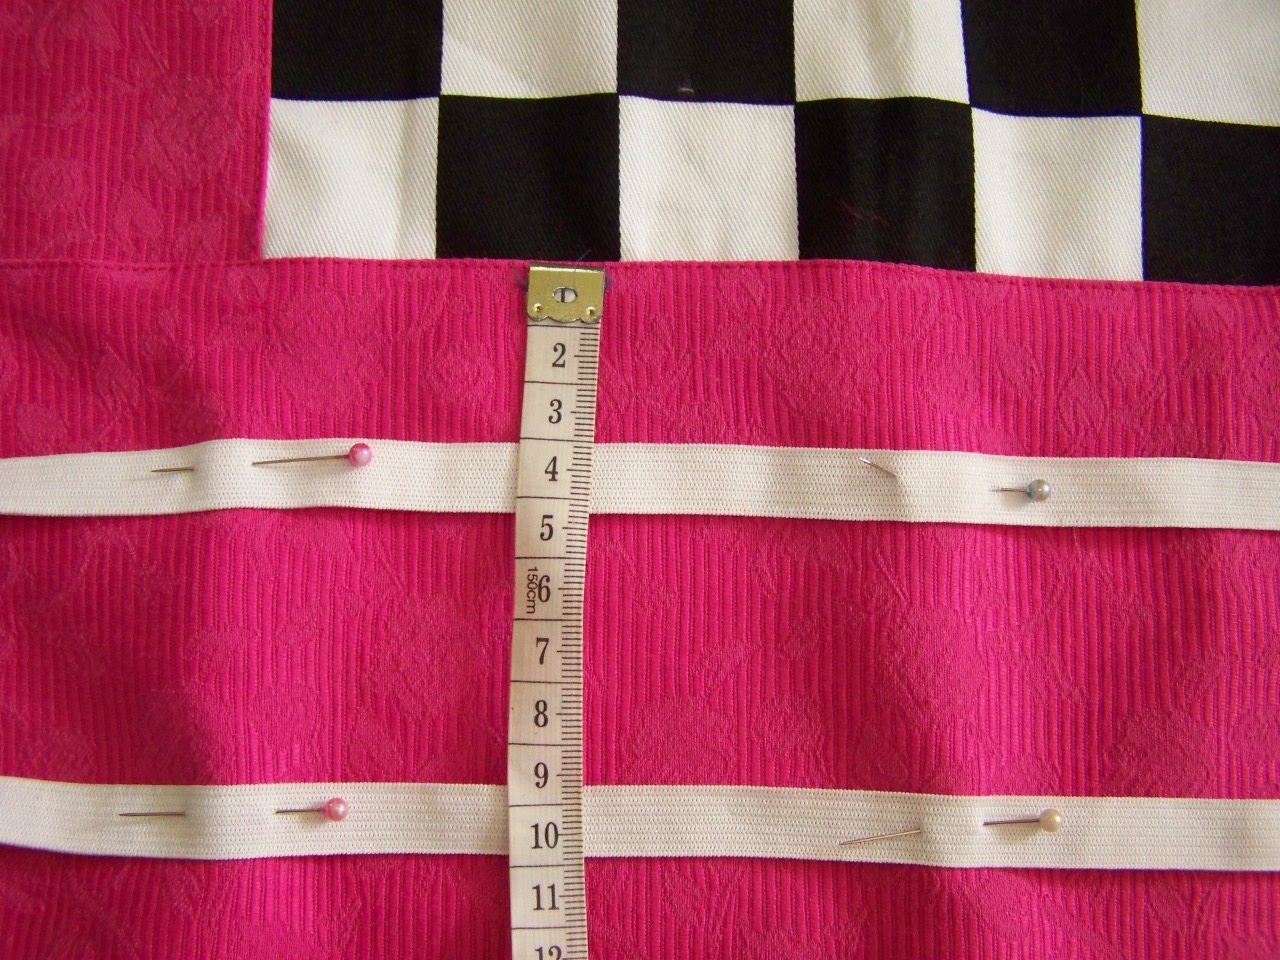

Then stitch the little 'holders' for the chesspieces by stitching lines across the elastic. How wide you stitch will depend upon the size of your chesspieces. For my larger ones, I could just use the edges of the chessboard squares as guidelines, but had to narrow the gap for the pawns on the lower strip. The best way it to check as you stitch, or if you want it to be perfect first time, use a piece of scrap fabric and elastic to check the sizes first, then measure and mark before you stitch:

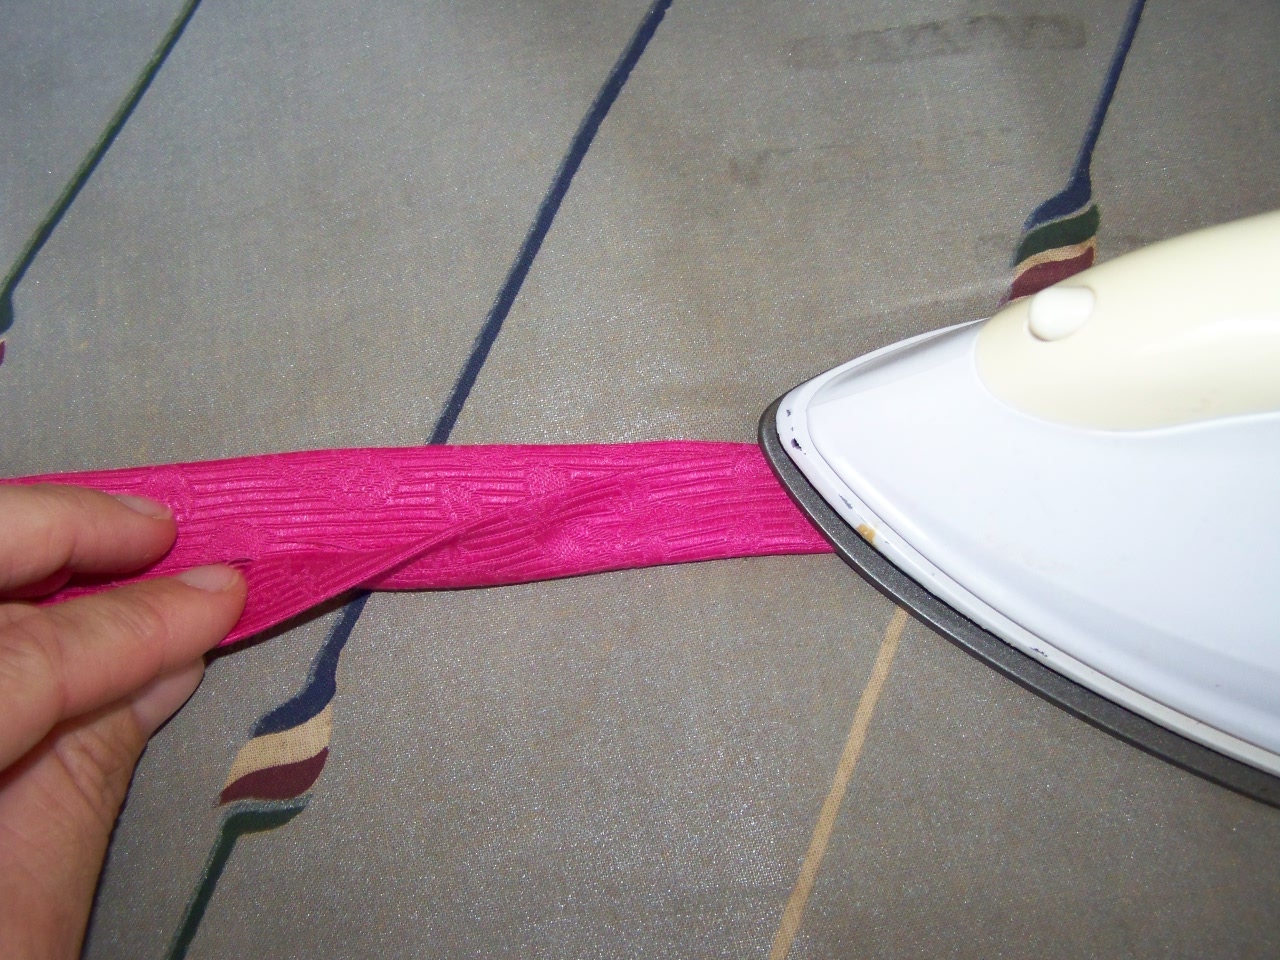
Now for the ties.
Using an iron, press the short edge of each tie over,

Then fold the straps into the centre lengthways and press:

Then fold the ties in on themselves once more to hide the raw edges completely - and press:
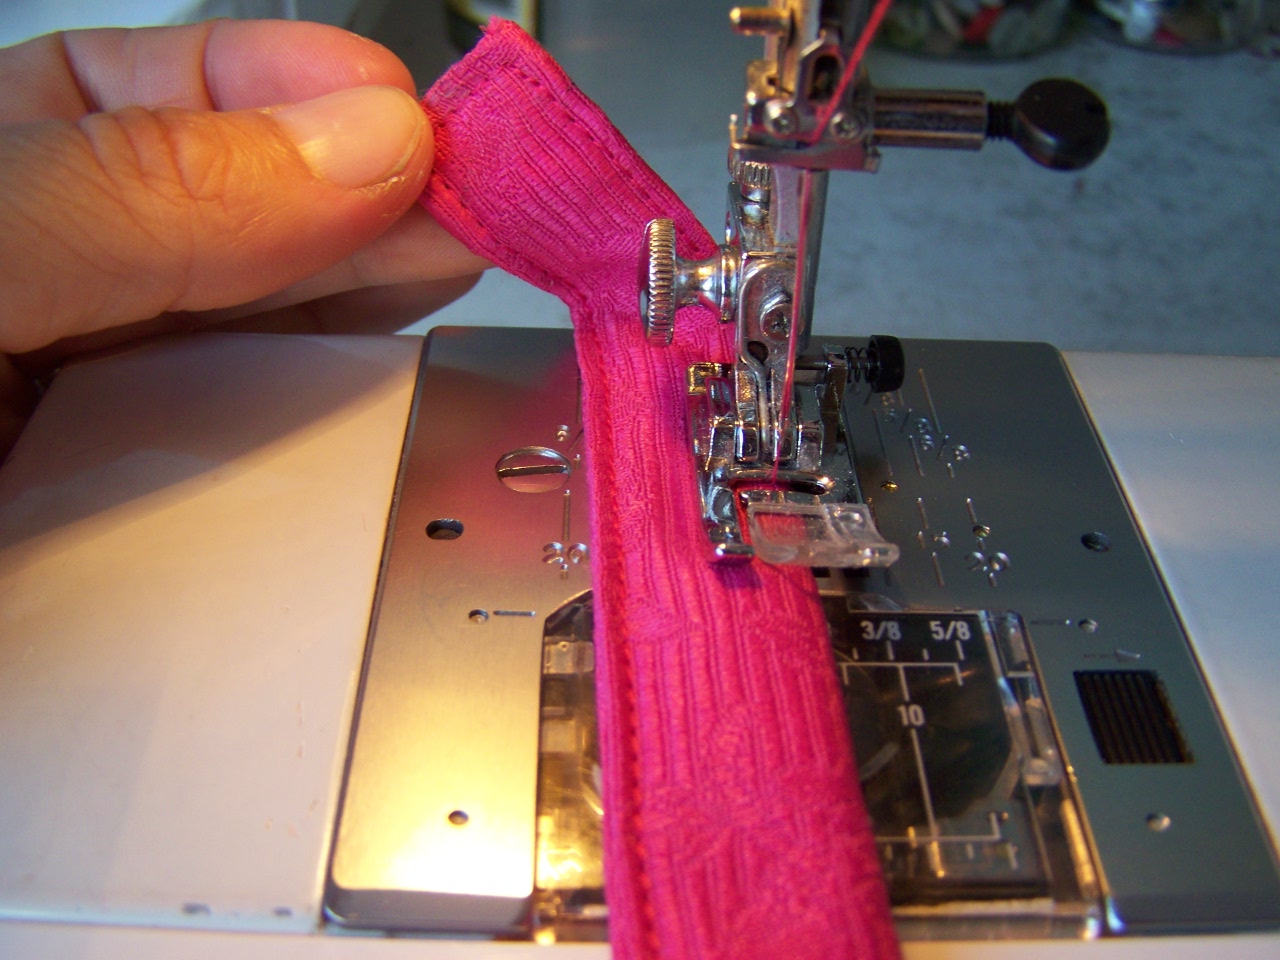
Then topstitch around the edges:
Now is the time to add any embellishments you want to the outer fabric. Centre them level with the bottom two rows of elastic, as this will be the section of the outer fabric that will show on the top when the chessboard set is folded up:
I chose to add a chessboard fabric ruffle!

Pin and stitch your embellishment into place:

Now it's time to join the front and back together.
Place the two pieces, right sides together, and the two ties in the centre of the bottom in between the two pieces:

Pin all around, leaving a gap at the top - opposite end to where you pinned the ties:

Then stitch the two pieces together. Don't worry if the edges don't match up exactly - as you can see mine didn't! Just make sure when you stitch, you catch in all the edges of the elastic, and don't forget to leave that opening to turn it all out through.

Have a quick check (turn right sides out briefly) to make sure you've stitched far enough in to catch the edges of all the elastic, then trim the edges and corners:

Turn right sides out, press, and pin the opening closed:

Then topstitch around all four edges:

And you're done!! Put your chesspieces in:

Roll / Fold up and tie together to secure!

There you have it - a fabric chessboard set:

You can choose the fabric to suit whoever you make it for - pink and ruffly like mine - or boyish planes, or camoflague fabric! Personalise your chess set!
For the downloadable PDF version of this tutorial, click here.
If you liked this tutorial, then why not check out my others, there are over 100 for all levels of sewing ability on


What a wonderful idea! Thanks so much for sharing!
ReplyDeleteWhat a fun thing to make. I think my little boy would love this. He has been wanting to learn to play chess. This is a perfect travel size one
ReplyDeleteAwesome This is so creative!I agree with the post above great to take on the road or to the beach/park I’m your newest follower from Creative Bloggers Hop. Please follow http://sweetcalifornialiving.blogspot.com/
ReplyDeleteOMG I love this! Perfect for long train rides :) Thanx for the idea!
ReplyDeleteOh wow, I really like this one Jill! Very creative and practical - fantastic idea, thanks so much for sharing!
ReplyDeleteVery nice work - what a wonderful personal project.
ReplyDeleteGreat Mom.
very cool idea! thanks for sharing this at my party!
ReplyDeleteWhat a brilliant idea....wonderful tutorial too.
ReplyDeleteYour fabric chessboard is such a neat idea! Really appreciate you sharing this great post with us at the Creative Bloggers' Party & Hop :)
ReplyDeleteWow, I love how you put this together! What a great thing to have on hand! I love it!
ReplyDeleteI would LOVE to have you stop by and share this at my For the Kids Link Party! Stop on by!
http://sunscholars.blogspot.com/2011/04/for-kids-friday-8_28.html
A few days ago I made a portable / mobile tangram. (https://www.facebook.com/photo.php?fbid=1263450870462986&set=a.1241937725947634.1073741825.1165430473598360&type=3&src=https%3A%2F%2Fm.ak.fbcdn.net%2Fsphotos-h.ak%2Fhphotos-ak-prn2%2F983701_1263450870462986_1946260572_n.jpg&size=658%2C960) Chess is fantastic. I hope you understand me - I live in Poland
ReplyDelete