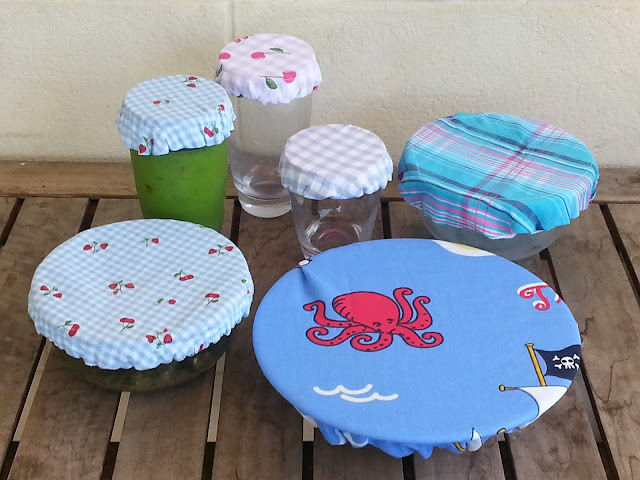
For a long time now I've been wanting to make myself some of these fabric bowl covers. I remember when I was a child, we used to have a set that we used when we ate outside in summer, to keep the flies off the food.
Nowadays I have just been using cling film (glad wrap) to cover my bowls - and feel bad every time I do it thinking of the plastic waste I'm creating!
So I finally got around to making myself some, and thought I'd add another new tutorial to show how easily you can make your own Reusable Fabric Bowl Covers.
All you need is some fabric, elastic and paper for a circle template.
I just used simple cotton fabric from my scrap boxes. I can just through them in the washing machine with a regular wash every now and then to keep them clean.
For the elastic I used pieces reclaimed from the adjustable waistbands of old worn-out kids' pants!
You can make these covers any size you need.
So here is now to make your very own Reusable Fabric Bowl Covers in just 5 steps and 15 minutes!
1. Cutting out
Cut a circle of paper around 5 cm (2") wider than the bowl you want to cover.
Lay your two fabrics right sides together and pin on your circle template. Cut.
2. Stitch the circles
Stitch the two circles together around the outside, leaving a small gap, then turn right sides out and iron.
3. Making the casing
Cut your elastic just smaller than the diameter of the top of the bowl you want to cover. Then stitch around your circle in from the edge wide enough to allow space to thread your elastic through.
4. Adding the elastic
Using a safety pin, thread your elastic through the casing you just created. Stitch the ends together securely,
5. Finishing
Finally, top-stitch the opening closed, either by machine or hand.
And there you have a finished fabric reusable bowl cover!
You can make them whatever size you choose - to cover bowls, plates and cups.
I made several sizes and used up some of my scrap fabric in the process.
I'm really pleased with how they turned out.
Cute, functional and eco-friendly! What could be better?
For the free downloadable PDF version of this tutorial, click here.
And for more sewing tutorials showing things you can make in just 5 steps and 15 minutes - go here.


Great idea! I've got a Craft Gossip post scheduled for tomorrow afternoon that features your tutorial: http://sewing.craftgossip.com/?p=88087 --Anne
ReplyDeleteOh thank you so much Anne!!!
DeleteThese look great and as you say very eco friendly compared to cling filming everything - I think I'll be having a go very soon :) Lovely to find your blog through Clairejustine's Creative Monday linky - I'll be back for more!
ReplyDeleteSpecial Teaching at Pempi’s Palace
Thank you!!!
DeleteWhat an awesome idea! I've never thought to make my own covers before. (visiting from Meet Up Monday)
ReplyDeleteThanks Julie!
DeleteI need to make these!!! I feel bad every time I use glad wrap too, I tend to use a plate on top but these would be much more secure, thanks!
ReplyDeleteThanks Nina. I use mine all the time now and need to make some more too!
Delete