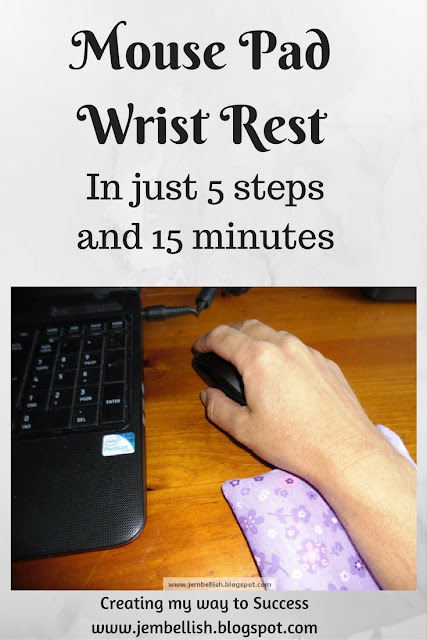
These days I use the computer a lot and was finding that my wrist was getting sore from using the mouse for long periods of time.
There are lots of wrist supports that you can buy - but why buy when you can make one?
This is a nice simple project -
another one with just 5 simple steps, that you can complete in just 15 mins!
Here's how:
1. Take a piece of material 24 cm x 16 cm (9.5 x 6.25")
fold in half lengthways right sides together and pin.
Stitch around the edges, leaving a gap of around 3 cm (1") to turn out. Snip corners.
2. Turn right sides out through the gap, and then fill 2/3 full with dry rice using a funnel.
3. Pin and machine stitch the gap closed.
4. Now to make the cover.
Cut a piece of fabric 28 x 16 cm (11 x 6.25"), and double turn one of the shorter edges and stitch to neaten.
5. Finally lay the rectangle of fabric right side up, fold the finished short end in 4 cm (1.5").
Fold the other end over, like this:
Then pin and stitch along the top and bottom sides:
Turn right sides out, slide in your rice pack,
And now you have your own ergonomic mouse pad wrist rest!
Which I also made in a slightly less girly version too - from some luxury gold velour!
Why not try making one for yourself - and save your wrist getting sore?
For the downloadable PDF version of this tutorial, click here.
For over 100 more free sewing tutorials for all levels of sewing abilities, take a look at My Free Tutorials Page.


Simply sweet!
ReplyDeleteWhat a fabulous idea for a beginner project, Jill!!!
ReplyDeleteFunctional and quick project. Great idea!
ReplyDeletewhat an easy project to work on with scraps! :)
ReplyDeletethanks for sharing...
xx, zhing
cool! I get wrist pain when i am on the laptop for long inspite of using external wireless mouse instead of the touchpad! will surely try this out! Thanks Jill for sharing this!
ReplyDeleteHello Jill, what a joy to review the parents, feel the warmth of true love really close.
ReplyDeleteI loved the support hand full of rice, this interesting technique.
Here, we are living hell with the blogger, because of some malware and I can not see my reader and not even making posts.
Whenever possible try to keep up with you friends so far.
Sweet week, Dolly
I like this Jill. It's such a simple and clever idea. Thanks for sharing. x
ReplyDeletehey, I just realized because the rice bag comes out you could micro wave it for a few seconds and it would be a warmer too... ;)
ReplyDeleteput it in the microwave for 20-30 seconds, to make it a hand warmer. that's what we do with ours.
ReplyDeleteComment---rice can be a draw for weevils. I always put one or two bay leaves in anything I make that has rice or beans in it. I learned this lesson the hard way after being over run and not figuring out where they were coming from. When I opened up the little bean bag cow it was just FULL of weevils. Because I wanted the cow, I popped the whole thing in a baggie and put it in the freezer for a month. After that I replaced the beans, added the bay leaves and everything has been OK since. That was 4 years ago. (Of course, I also had to clean out all my cabinets and check every box of stuff that had flour or sugar in the ingredients.)
ReplyDeleteso use beeans instead
DeleteThanks so much for this! I am just starting to learn how to sew again and after a failure "simple" project earlier, this was the perfect, simple project I was looking for :) It helped build some confidence. I can't wait to try some of your other tutorials!!
ReplyDeleteOoh my gosh, it was filled with rice, RICE!!! I thought it would of been some costly filling,rice. I love this idea, forget teacher, Im making it for me. My wrist do get sore but I never considered a such a project. OK since its rice,ill make one for teacher too. Thanks alot for giving me such a wonderful idea and keep up the great work.
ReplyDeleteWhat are you sewing around in step number one if there is only one piece of fabric? The photos do not show any stitching at this point. Or are you suppose to sew two pieces of 9.5 x 6.25 together?
ReplyDeleteThere is just one piece of fabric in step one. You fold it in half then stitch.
DeleteReally interesting. I also want to try this at home, although I have collected very charming mouse pad at PIJ, I also want to make this nice and cute one too. Thanks for sharing your tutorial.
ReplyDeletehttp://bit.ly/takashii
Thank you Kashfiya!
DeleteThank you so much! This is wonderful!
ReplyDeleteI bet when your wrist gets sore you could heat this in the microwave and get some relief while using it (like those neck warmers).
ReplyDeletetried this, however my wrist is still killing me. I'll probably have to surrender and just buy one of these ergonomic mice, not sure which one yet: http://bit.ly/2HUpf1M
ReplyDelete