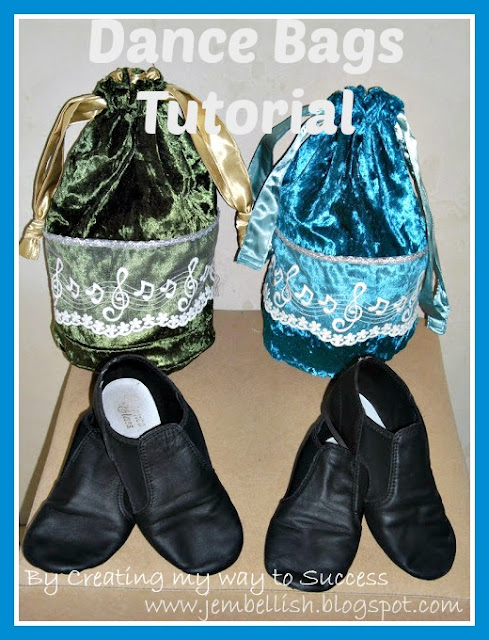
I made these bags using some
white lace music notes:
They are the perfect size for a pair of dance shoes and one dance outfit, and my girls adore them!!
Here's how I made them:
Cut 2 rectangles of fabric - outer and inner, 55cm x 35cm (21.5" x 14")
2 circles for the base - one of each fabric. I used a circle with radius 8cm (3.25")
2 strips of fabric for the handles 70cm x 10cm (27.5" x 4")
White lace music notes - 55cm long (21.5")
For the 'handles' or drawstrings. Fold the fabric in half lengthways and press, open out,then fold the sides into the centre and press again, then in half again to make neat strips with no raw edges showing.
Top stitch all the way around both strips:
Next, stitch the lace to the main outer bag part. I neatened the top edge with a double hem, then added some silver ric rac to cover the stitching.
Fold the inner fabric rectangle right sides together, and stitch down the side.
Then pin the base circle to the bottom of the bag right sides together and stitch:
Repeat this with the outer fabric - making sure to match up the lace when you stitch the sides together.
So now you have 2 bags - the inner and outer.
Before you put them together, you need to sew two buttonholes in the top of the outer bag - around 3cm (1.25") down from the edge. This will be where your handles/drawstring threads through.
Now turn the outer bag inside out, and push the inner bag inside it - so the right sides of both parts are facing each other.
Pin the bags together around the top - remembering to leave a small gap to turn them right sides out. Then stitch.
Turn the bag right sides out, and push the inner bag into the outer bag. Then top stitch around the top of the bag:
Run another line of stitching parallell to your topstitching but below your two buttonholes. This is to make the casing for the handles / drawstring.
Then using a nappy pin / large safety pin, thread your handles through the casing in the top of your bag. One through either side - all the way around, and tie or stitch the ends.
I used velour for the outer fabric - and shiny fabric for the inner - this works best for the drawstring handles as it slides through well when you open and close the bag.
Perfect for little dancers!! or even big ones!
For the downloadable PDF version of this tutorial, click here.
If you enjoyed this tutorial, there are over 100 more free sewing tutorials for all levels of sewing abilities on
My Free Sewing Tutorials Page


I bet the girls were absolutley thrilled!
ReplyDeleteMaking a dance bag was one of the best things I did for my sanity of keeping track of shoes, etc. These are beautiful!
ReplyDeleteAndrea
addicted2tutes.blogspot.com
Nice site. Boy do I ever wish I could sew! Found you on BSN. Am following you, please follow me back! Thanks.
ReplyDeleteBeautiful dance bags, love the fabric!!
ReplyDeleteVery cute! I bet your girls loved them.
ReplyDeleteVery cute :)
ReplyDeletevery pretty great work bet they looked great
ReplyDeleteThese are adorable! I LOVE the music notes!
ReplyDeleteSo darling and practical! Your kiddoes (kidettes?) sure get nice things courtesy of their talented mom!
ReplyDeleteLovely blog!
ReplyDeleteI'm already a follower!
Have a great week!
nancy
Cool idea! I am a new fan following you from the hop via GFC and facebook.
ReplyDeletehttp://www.ourbananamoments.com
http://www.facebook.com/ourbananamoments
Marsha
So beautiful Jill! I love the color and fabrics you chose. What a creative way to incorporate the lace into your project!
ReplyDeleteCat-Minoaka Bebe
And to think I went out and bought dance bags! Brilliant!
ReplyDeleteFound you on Sew Much Ado!
Thanks everyone for your lovely comments! The girls filled their bags again this morning, and I'm off out to pick them up from school soon for dancing again! So nice to have things raedy and waiting for me!! Hope it lasts!!
ReplyDeletefollowing with gfc!
ReplyDeleteThanks for linking to bacon time. Pretty,
Hope to see you again this week.
Jill, they look lovely! Wow, we've given Wholeport so much promotion lately - LOL! But they deserve it coz they're very nice and they have lovely products.
ReplyDeleteI'm so grateful that you linked up in this week's Creative Bloggers' Party & Hop :) This awesome post totally rocked the party!
I love these! What a great way to make the girls feel special. You are super talented! I only hope I can be as crafty as you when my kids get older,
ReplyDeleteThanks for linking these to Rub Some Dirt On It!
Wow! These are absolutely lovely!
ReplyDeleteThank you so much for linking up such a great tutorial to my party!