

I started out with the intention of making a laptop cover using a tutorial I found, but our old laptop has these little catches on the inside, which would have been covered over and then wouldn't have shut properly! Sigh! Nothing is every simple and straightforward is it!

Love the palm tree in the reflection here!!!
Anyway.... I decided to make a bag instead.
Our daughter has our old laptop - but it's set up right in front of my sewing machine..which as you can imagine is not ideal for me - and I have to keep moving it!

So now that it has it's own bag - moving it will be much easier!

So here's my tutorial if you'd like to try one for your laptop !
--------------------------------------------------
The laptop I made this for measures 36 cm x 27 cm x 4 cm.
All laptops are not made equal so you would need to measure yours to see if you need to enlarge or reduce my measurements.
This bag holds the laptop itself, power cord, mouse and cord and mouse mat!

Materials you will need:

2 Pieces strong outer material( I used curtain fabric) 44 cm x 42 cm
2 Pieces soft inner material (I used fleece) 44 cm x 42 cm
1 Pocket piece 30 cm x 23 cm
1 Pocket piece 22 cm x 22 cm
2 Straps 34 cm x 10 cm
Stitch in velcro - 2 pieces for pockets 8 cm each
1 piece for main bag 33 cm
First take your two pocket pieces - and double turn and stitch the outer edge to neaten, and stitch on one side of the velcro centrally placed:

Next lay one of your outer pieces of fabric over the laptop to help you place your pockets:

Pin in place, turning the raw edges under.
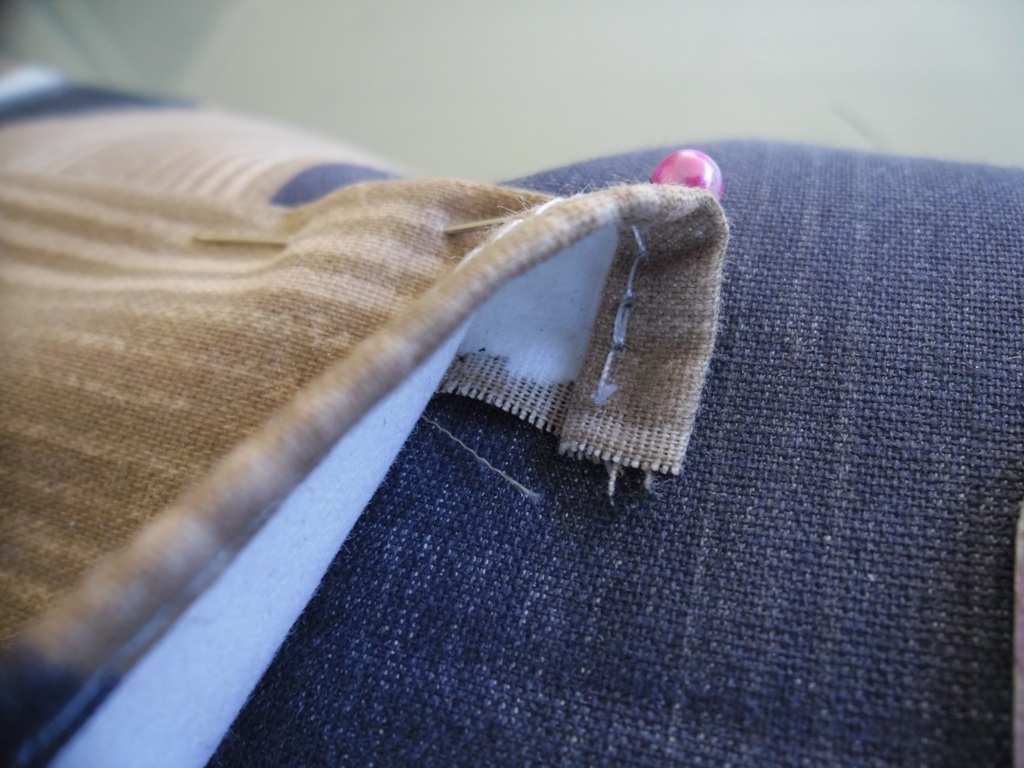

Concertina the corners just a little like this so that the pocket is not totally flat:

Pin the other side of the velcro to the main bag piece, then stitch the velcro and the pocket firmly into place.

Repeat for the other pocket:

For the straps - fold them in half, then open out and fold the outer edges in towards the centre fold, and stitch along both long edges: Pressing the fabric along the folds will make this easier:

Now you're ready to assemble the bag:

Pin the outer pieces of fabric, right sides together and stitch around 3 sides - leaving what will be the top of the bag open.
Repeat this for the inner pieces of fabric.

Clip the corners, then turn the outer fabric right sides out - and slip the inner 'bag' inside it like this:

Pin the handles in place on both sides of the open bag top, then stitch securely:

Turn the outer and inner fabrics in on themselves to hide both raw edges. Make the turning around 3cm to allow for plenty of secure stitching! Pin the inner and outer fabrics together:

Stitch two rows all around the top of the bag - then pin and stitch the velcro in place on the inside opening of the bag:

Now your bag is finished and ready to put your laptop and accessories in:


For the downloadable PDF version of this tutorial, click here.

And for over 100 more free sewing tutorials for all levels of sewing ability , check out my Free Sewing Tutorials Page.

Happy Sewing!

Looks great!! Just keep it away from the pool. I am a new follower.
ReplyDeleteThis is amazing! Thanks so much for sharing! Hope to see you on my blog:)
ReplyDeleteHave a nice week!
Sanghamitra.
Hiya, thank you for your lovely comments on my blog. You said the wrong thing though--that you live in Australia! My husband and I are planning on moving there in two years after he finishes his medical training. I would love to hear how you ended up there and pick your brain if you had the time...........
ReplyDeleteThis came out great! Now I want to make a bag for my laptop It definitely does make storing it cuter:>
ReplyDeleteI found you through Busy Mom's Tips and I am a new follower!
ReplyDeleteWhat a great idea! I totally need one of those for when I work outside the home.
ReplyDeleteThanks for sharing at the Weekend Warrior!
Anna
www.askannamoseley.com
I love this! I'm inspired by your blog everytime I drop by and I definitely want to try this tutorial so I have a proper bag to put my laptop in...first I have to get my machine going!
ReplyDeleteYou SO make me want to get out the dusty sewing machine (that I can't use) and the Martha Stewart's Beginner's guide and teach myself how to sew! Great work!
ReplyDeleteThis turned out FANTASTIC!! I love the pocket! :)
ReplyDeleteThis looks amazing!! TFS!!
ReplyDeleteStopping by from The Girl Creative linky party and your newest follower.
Here is what I shared this week: http://craftybrooklynarmywife.blogspot.com/2011/06/summer-pillows.html
Happy 4th of July!!
This is a great project!
ReplyDeleteyou have so many beautiful things i would love to make. I just found your page today. this is beautiful but I do not see a PDF download for this item. Please email me at YummyLv@aol.com
ReplyDelete