Pages

Just do it - week 2 update!

(One of my completed projects this week!!)


Last week I posted about my Just do it plan to get my house tidied sorted and organised over the next 10 weeks.
I've finally reached breaking point with the mess and decided enough is enough.
Just today my daughter smashed her little snowglobe when trying to tidy up her bedside cabinet - due to the fact that there is so much stuff on there and really not enough space, and well, it is a mess.

I know accidents happen and things break - but things like this are far more likely to happen when things are piled up on top of each other and heaped in a mess!

So - how am I going with my plan?

GREAT!

Now I am a great list maker - I write lists for everything.
I have started countless lists of things to do around the house - organising, sorting etc....  But clearly this tactic hasn't worked.

One of my favourite quotes is:

"Success comes from doing things differently"

So, I figured for me to be successful in my organisational quest, then I need to NOT do what I've done before. Out does the list!

I've been just tackling jobs as I see them and when I have a minute.
First up this week was fixing our letterbox.  Since we moved into this house I've wanted to replace the letterbox with a nicer one. It's been leaning on it's small dodgy post at an angle and the box itself was very rusty.  Then a few weeks ago someone running past the box at night managed to knock it off it's post completely!

So - this week I pulled out the old post - got my husband to cut a section off an old fence post we had; dug a big hole, set the post in concrete, repainted the letterbox itself and fixed it to the new post!
Now every time I come home - I see the nice new, upright letterbox and feel happy and motivated to do more things!
Lesson learnt:  do something visible first, so this serves as a reminder of how good it is to get things done!!

Then while I had the drill out from fixing the box to the post, I did a few other small jobs around the house that needed a drill - another ribbon board for the girls medal wall, a few hooks here and there and fixed up some loose hooks! - all things that had needed doing for a long time. 

I also did HEAPS of weeding and tidying in the garden.  Living up here in the tropics, everything grows very fast and can get out of control very quickly.  I keep saying that if only I could get the garden under control, then it would only take me a little time regularly each week to maintain it.  A large portion of the garden is now at this stage and ready to implement my 'maintain' plan.  Still a few sections to tidy up - but it's a good start!

Again this is something very visible - that I see every day and feel proud that I'm getting things done - again motivating me to keep on with my masterplan!

---------------------------------------------

After school yesterday, my eldest daughter was finishing off her homework.  She gets her homework a week in advance and we're trying to encourage her to do it straight away - generally over the weekend, and not leave it until the last minute. Yesterday however, she left it and left it until the last minute then was fed up and rushed the last part.  

I asked her, "Why didn't you do this part with the rest of your homework at the weekend?"

"Because I couldn't be bothered," she replied. 

"And could you be bothered to do it tonight?" I asked.

"No," she replied.

I tried to explain to her that when it comes to things that you don't want to do, or things that are tricky - it doesn't help to put them off to later because you don't want to do them any more another day, or they don't magically any easier or fun.  The best thing to do is to do them straight away and get them over with.

Taking some of my own medicine yesterday, I cleaned the ceiling of our patio.  Every year it needs wiped down, but it's a horrible job - reaching up high to wipe, up and down the stepladder to rinse the cloth out, sore neck muscles the next day from looking upwards and backwards.... 
So yesterday I'd planned to just do it, motivated by a patio party we're having this weekend.  My husband suggested that I could just use the water pressure cleaner instead - that would be much easier! Fabulous I thought - it will be done in minutes and sparkling clean without too much effort.

WRONG!! I got soaked - with all that water spraying up above my head, and it just didn't work at all cleaning the dirt/dust off!

My first thought was that I'd spent all that time getting the water blaster out, setting it up and trying to use it, that I was now tired and couldn't be bothered so I'd just leave the ceiling.
I went inside, sat down with a cup of tea and watched part of a movie I'm watching in bits, feeling fed up that this easy way out plan hadn't worked!
Then after a while, I started to think that really, I should just get up and wipe the ceiling while the patio was clear. (My husband helped me move all the furniture off the patio so it was easier to clean).
I knew the job had to be done sometime, and also knew that it would be there - literally hanging over me until it was done.

So - just as I told my daughter about her homework - I got on and did the job I couldn't be bothered to do there and then. It wasn't going to get any more attractive as a job in a few days or weeks time, and it wasn't going to go away and not need doing anymore.

So I just did it!
I don't know if you can see here the difference - cleaned on the right side of the fan, still dirty and dusty on the left.


But now it's all done!

Phew!! So I'm pleased with how much I got done this week.  

And I learned 3 things:

1. If you have an ongoing problem with tidying and organisation (or anything else really) - try something different.  For me this was to stop writing a list of what to do, and just to launch into doing things I could see!

2. Do something that is visible every day. This will make you feel good to see something you have achieved and motivated you to continue doing things!

3. Putting things off until another time doesn't make them any easier. It feels good to just suck it up and do it straight away - getting the painful process out of the way once and for all, then you can move on!


So on to next week - I'm going to show you a shameful photo - so that I know I will have to sort this out by next Friday and show you all a photo of how super organised and tidy it is then!

This is the desks I set up for my girls to do their homework and drawing etc on. In the middle are all their stationery and drawing things. But just now - they never want to use the areas because it is such a mess!  Too much stuff, not enough space.
Something needs to be done!
Come back next week to see what I've managed to achieve!

So how about you?  Are you joining in and getting a bit of tidying and organisation done in your home?

I hope you've all had a productive week!  
Thanks for reading! :)

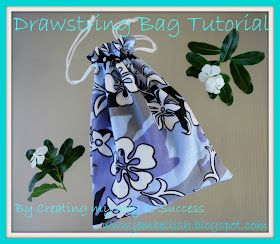
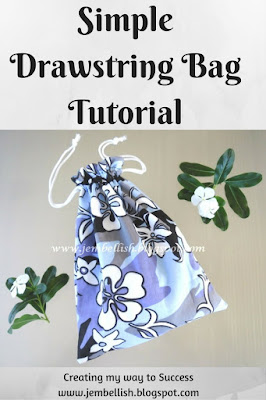
Drawstring Bag - a simple Tutorial


This is a tutorial for a simple, lined drawstring bag. I made this one for my husband's hair clippers, which for the past few years have been kept in a plastic bag, which is now starting to rip and bits are falling out of the bag!

Now - I sew a lot, and sew a lot of bags, particularly for my girls to keep all their things in.  So really it's quite shameful that this storage in a plastic bag has gone on so long!

Well no more!  I whipped up this little bag yesterday and threw out the ripped and torn old plastic one!

Do you have things stored in boring old plastic bags?  How would you like to make some cute new drawstring bags to keep them in instead?

Here's how!

1. First find some fabric for the outside and inside of your bag, plus some cord for the drawstring:

2. Now to choose the size, lay on top of the fabric what you would like to keep in the bag, and cut around it in a rectangle!

Remember if things are bulky to allow plenty of space at the sides and bottom of the rectangle!
My bag piece was 36 x 28cm (14 x 11").

Cut 2 pieces from each fabric this size:

3.Now place the inner fabric pieces right sides together and pin around 3 sides.


 Leave a gap of around 10cm (4") on one side.

  Then stitch around where you have pinned.


4. Now repeat this with the outer fabric, but this time leave two smaller gaps near the top of BOTH sides of the bag, around 2.5 cm (1") from the edge, and the gap should be around 2.5 cm (1") too:


Stitch around the 3 edges, making sure to leave the gaps at both sides. This is where the drawstring will fit through!


5. Now clip the corners of both the outer and the inner bags.

 Then turn the outer bag right sides out and push into the inner bag:

6. Pin the openings of both bags together..

...and stitch all the way around:


7. Now find the gap you left in the side of the inner bag, and pull the outer bag through this to turn the whole bag right sides out:


8. Pin and stitch the opening closed:

As this is the inside of the bag that no-one will see, I just machine stitched it. But if you wanted you could hand stitch it which would be a little neater!

9. Now push the inner bag into the outer bag and iron the opening.


Then using two rows of stitching, go around the whole bag on either side of the small openings you left in the outer bag. This is making the casing for the drawstring:


For the second row, the edge of the bag was past the measurements on my machine - so I used a tip I read recently and used an elastic band to keep my line of stitching straight!

10. Now all you need to do is thread your cord through the casing:
You need two pieces that are long enough to go around the whole opening of the bag plus around 10 cm (4") extra:
Use a large safety pin or a nappy pin to push the cord through the opening, all the way around the bag and out through the same side:


Then tie the two ends together:

Repeat this with the other length of cord from the other side of the bag:

And there you have - one fully lined cute drawstring bag to store things in!

Much better than an old, ripped plastic bag!!

You can make them whatever size you need! I'm sure as I work my way through organising my house, I'll find the need for a few more of these bags!


For the downloadable PDF version of this tutorial, click here.

If you liked this tutorial - there are over 100 more sewing tutorials to suit all levels, and to make all sorts of useful and fun things - on 

Do go and take a look!


Just do it! (and the best idea for cleaning fans ever!)

First of all today I wanted to show you my new pretty

ceiling fan duster

If you have ceiling fans in your house like me, then you must have had the experience of dusting them and in the process of doing so, getting covered in dust yourself and having dust all over the floor under the fan!

NO MORE!!
Jenni from Snippets of my Family, Faith and Crafting, just posted a super simple tutorial on her blog for making a clever 
ceiling fan duster!
It's basically like a little bag that you slip over the fan blades and wipe the dust into it!
GENIUS!
So all the dust goes inside the bag instead of on you or the floor!
Then you can just throw the bag in the wash!


I saw this tutorial yesterday and as part of my new plan to 'just do things' and stop procrastinating, I sat down and whipped one up straight away and cleaned all the fans in my house!
Making this bag also meant I had to use my overlocker (serger) and had to fix the broken needle I'd left in there from last time I used it!

(You see I'm terrible at leaving jobs 'til later....)


Now having shared that new 'gadget' with you - let me explain more about my 'just do it' plan!


Recently I have come to realise that it's basically my tutorials and clothes upcycles that brings visitors to my blog.  My other posts  seem to make little or no impact or difference.

SO, aside from focussing on more tutorials and upcycles, I've decided to use the extra days and posts to my own advantage and do something that will help me personally - and who knows maybe inspire others to take action to!  I don't know that this will help grow my blog or not - but it's just something I feel I need to do for myself, and at the end maybe my head along with my house will be clearer and I'll come up with a new fabulous masterplan for the blog!

---------------------------------

A while ago. I used my facebook page to try to change my messy habits and learn to keep the surfaces in my house clean by using the theory that it takes 21 days to form a habit
Every single day of those 21 days, I took a photo of my nice tidy surfaces and posted them on facebook.  This worked by keeping me accountable
 ( thank you to those facebook friends who liked and commented on those photos and kept me going!)

And you know what? I did it! For 21 days I kept those surfaces clean and clear, and 6 months later they are STILL clean and clear! I like my new 'tidy surfaces' habit!

I do have lots of these bursts of motivation and get myself into gear, but, like everyone I have spells of laziness and inactivity. What I really need to be is CONSISTENT!

So - now I'm going to set myself an even bigger challenge and one that will benefit me HUGELY and hopefully have a very positive knock on effect to all areas of my life, including my blog!

I have a BIG list of things that need doing, sorting, organising and tidying in my house.  I've made lists, I've even made plans, but the list just keeps on growing and not much gets done.

So I have set myself a time limit, and will post my progress on my blog and facebook to keep myself accountable!

My time limit is to have my house, yes my WHOLE ENTIRE house, organised, tidy and sorted by November!
I chose this date as it's roughly 10 weeks away, which is a nice round number, and also, I know that once November arrives, I'll want to be Christmas crafting and sewing; the school year will be almost at an end, and summer will be upon us here in Cairns.

A couple of days ago I decided to start with my bedside cabinet drawers. Stuffed full of things I don't know what to do with , but I'm sure are useful!
When I came back from dropping my girls at school, I emptied the drawers onto my bed:


Mmm - not so pretty hey?
I looked at the pile and thought - B#@#$%$!! I don't know what to do with it all!  Precicely the reason they've stayed like that for so long!
But - this time I'm all action remember! So I gradually sorted through the mess, and by the end of the day..


Yippee! A great start!  

So now I've got to keep this going!
Some jobs are simple tidies like this, some are ones that I need to sew some nifty organising things for (which means more tutorials for the blog!! Bonus!) , some are fixing, and who knows what else!

But by November my house will be so tidy and organised that I'll be able to look at the world with fresh eyes and and a clear mind! I'm sure my family will be happier too!

And for anyone who has lasted to the end of this post with boring photos of my messy drawers - thanks !

Does anyone want to join me in this challenge and get their house in order? Every Friday I'm going to post my progress and show what I've done to organise or tidy my house. So do come on my and share what you've done too!

Or are you perhaps one of those people that I'm striving to be like and you already have a tidy, organised living and working space!  If so - good for you! I'll be joining you soon!


Dragon Costume!


This week is book week at my daughters' school. 
Tomorrow, my youngest has to dress up as her favourite book character.  
This year she has chosen Glade the Dragon!

Mmmmmm - yeah Mum - I want to go to school dressed like that!!

But, I do like a challenge, so here's what I came up with!
Starting with this.....


I added a hood, spikes down the back, made the back section longer than the sides - and wrapped that around to make the tail.  
I added wings..


and a leaf necklace,

And finally covers for her boots so she has proper dragon feet!

So now she's all prepared for tomorrow!
What do you think?

The light was fading when we were taking pictures, hopefully I'll get some better shots tomorrow when she wears it for school!

What costumes have you made for your kids - or perhaps yourself?