Pages

One pair of jeans upcycled to all this...


This year I've been making some Christmas gifts from an old pair of jeans.  I've managed to use up almost the entire pair of jeans. Here's what I made...

First I made a Lesa Bag - which took up most of the fabric of the jeans. I used part of an old dressing gown for the bag lining.

Then I made a pair of pot holders from the back pockets, using this tutorial.

Then a personalised pencil case from the remaining large leg parts:

A key-chain pouch from the last flat part of fabric:

Then finally I stitched the scraps together, braided the seams to form a handle, 

and again used part of that old dressing gown for the lining, and made another small bag:


Now all I have left is some left over seams,
Which I save for hanging loops of key-chain loops like this:

And the very last tiny scraps which I admit I threw out (gasp!!) I know - I probably should have kept them for stuffing something..or other.....

Not bad for just one old pair of jeans!
Here's another look at the final result:

I'm pretty pleased with that! 
What do you think? What have you made from old jeans?

To see lots more ideas for upcycling old jeans, look in the Clothes Upcycling linky where there are hundreds of ideas for upcycling old clothes - and more being added all the time!


Happy Upcycling!


More gifts from jeans - Denim pot holders


I managed to get yet another gift out of the pair of jeans I have been upcycling!

So far I've made a Lesa Bag, a pencil case, and now I've made a pair of Pot Holders:

I made a pair of these for myself earlier this year - so used my own tutorial which you can find here.

The pockets are perfect for slipping your hands in to grip the hot pots!


And I chose to use some tartan fabric for the quilted side, since the recipient is Scottish!

I hope she likes them!


Not a lot of those jeans left now!


Upcycled denim jeans to pencil case


I made another birthday gift this week for one of my daughter's friends.
I still had some denim left over from the jeans I used to make her swim coach a Lesa Bag

So I used this to make a pencil case:

With the birthday girl's name on the front..
And cute little doggies on the inside!


Hope she likes it!

An upcycled handmade gift - The Lesa Bag


This week I've been trying to get Christmas presents organised and made.  Here's another I finished - a new Lesa bag for my younger daughter's swim coach.

I made this one out of a pair of jeans and the lining from a dressing gown!

I made myself one of these bags out of an old pair of jeans - and I use it all the time, it's my current favourite bag.
The selection of pockets inside and out are just perfect, and the denim makes it nice and sturdy!

A pair of adult jeans is the perfect size to cut this bag out from.  The  back section had to be cut across the seam of a leg piece, but I think it looks ok, don't you?


The pattern for the Lesa Bag can be found here.
It's chock full of photos and easy instructions for each step.


So, that's another Christmas gift made and checked off my list.

And I still have some of the denim left over from these jeans - which I'm going to use for 2 or 3 more small gifts!!

Are you upcycling for any gifts this Christmas - or decorations perhaps?


Tartan gift bags


A simple handmade gift bag can make all the difference.

Our daughter's swim coach is heading back to her native Scotland for a long Christmas break, so a few of the parents have pooled together to get her a present.


Which all wrapped up in some nice Scottish tartan should be well received!

The wine bottle bag is just a simple piece of fabric folded in half, stitched down the side and bottom and the top hemmed - with a ribbon to tie around the bottle neck.


Full Solar Eclipse Cairns


Here in Cairns we just experienced a full solar eclipse!  
Very impressive and exciting!
The last one we had in Cairns was in 710AD and the next one here won't be until 2237!
So it's kind of special that we are here for this!
(this photo above was just taken with my small digital camera at full totality!)

We bought special viewing glasses which enabled us to watch the progress of the moon across the sun. Through the sunnies the sun appeared like an orange ball, and you could clearly see the curve of the edge of the moon as it slowly covered the sun.

Then as it reached total eclipse everything went dark for around 2 minutes - just like a moonlit night!

And as this post goes live, we're still in our back garden with the special sunnies on watching the moon slowly work its way off the sun again on the other side.

Last year, our eldest daughter studied the phases of the moon at school - she remarked that it's like watching the phases of the moon speeded up!

How cool!

Have you ever seen a total solar eclipse?

Christmas yoyo wreath tutorial


I have a simple tutorial for you for a Christmas decoration made using just fabric scraps:

All you need is some fabric scraps in some festive colours.  I used some green from an old t-shirt and red scraps left over from a dress I made.

First you need to cut some circles.  One thing I love about making yo-yos is that your circles don't have to be perfect - and your fabric doesn't even have to be ironed!!  My circles were around 10cm (4") in diameter.

Then take a needle and thread, and stitch a long running stitch around the edge of the circle folding the outside edge of the fabric in a little as you stitch.

Once you've stitched all the way around, pull the thread and your circle will draw up into a small pouch.
Cut up the leftover scraps of fabric after cutting your circle and stuff them into the pouch before drawing it completely closed with the thread and stitching it closed.

Repeat this until you have 10 puffy yo-yos. 

Once you have 10 puffy yo-yos, take a larger needle and thick thread or wool.  Thread all the yo-yos onto the thread or wool in the order you want them, then loop the thread back on itself and secure to form your circular wreath.


Tie a loop of ribbon or coloured cord around the wreath to hang it with.
And add any embellishments you want. I stitched on a ribbon bow I had in my stash!


Then find the best place to hang your finished wreath!


For the downloadable PDF version of this tutorial, click here.

For lots more ideas of things to make for Christmas that are eco and budget friendly, check out my pageL


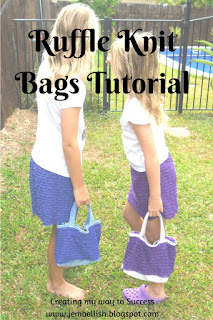
Ruffle knit bags! - a tutorial


After making both my girls ruffly skirts, and one ruffly top, I decided to add a little bag each for them.


I used some denim scraps from old jeans, fabric from my stash for the lining and of course some of the lovely ruffle knit!

Here's a simple tutorial for making one of these bags:


Materials needed:
Denim (or other strong fabric for bag base and handles:
1 piece 32 x 16 cm (12.5 x 6.25")
2 pieces 32 x 3 cm (12.5 x 1.25")
2 pieces for straps 33 x 8 cm (13 x 3")

Ruffle knit ( or other pretty fabric for main bag sides )
2 pieces 32 x 16 cm (12.5 x 6.25")

Fabric for lining :
1 piece 50 x 32 cm (19.75 x 12.5")


Lay out your outer bag pieces like this:

Pin, then stitch these strips together - right sides together to form the main outer bag section.


Now take your outer bag piece and the lining piece - both of these should be the same size.
Fold them in half - short ends together, and right sides together. Pin and stitch down both sides:


Note: be careful when you pin the outer fabric that you match up all the seams neatly!


Now to 'box out' the bottom corners of the bag.

Put your hand inside the outer bag piece and reach into one of the corners:

Flatten out the sides of the bag up at the corner with the seam in the centre like this:


Then you need to stitch across the corner 
 4 cm  (1.5") in from the point.
(I usually run 2 or 3 lines of stitching here for added strength)


Then cut off the corner outside your stitching.


Repeat this for both corners in both your outer and inner bag pieces.

Now to the straps.
Take the two strips of denim (or other fabric) for your straps and fold the outer long edges in to the centre like this:

Then fold the outer edges in again, so hiding both raw edges.
(If you feel more comfortable you can iron this as you fold and pin into place.)

Then stitch down both sides of each strap, close to the edge:

To attach the straps to the main bag.
Turn your main bag part right sides out and place one strap on each side of the bag matching up the raw edges like this, and pin in place:

Make sure the straps are in the same place on both sides of the bag.


Secure the straps in place with a couple of rows of stitching.


Now insert the lining inside the main bag:

And fold the top edges of both bag parts in towards each other to hide the raw edges. Pin all the way around:

Then topstitch all the way around the top of the bag to join the outer and inner bags together.


Done!  Now fill up and use your new cute little bag! 


My girls are 7 and 9 years old, and these bags are the perfect size for them.  You could use firmer fabric, or add interfacing to make a bag that holds it's shape better (I just wanted soft bags for my girls!).

For the downloadable PDF version of this tutorial, click here.


If you like this tutorial - there are over 100 more on my tutorials page - suitable for all levels and abilities of sewing!